
Let the Card Makeover Begin!
“Envelope Flap Cards”
In todays Tuesdays belated installment of Monday Makeovers ASM { A Stampers Mailbox }, it’s selfie style again today. I’ve reached back into the projects of the year and pulled a favorite card to share. You know how time gets away from you? That happened to me- I had so much fun creating and writing about it that it all didn’t wrap up in time to post yesterday. Terrific Tuesday:) Ya, ya -that!
I am one of three Stampin’Up! Demonstrators collaborating for virtual events & catalog launches. Our group is called Come, Connect, Create.
Today’s Before Card features a card I demonstrated for a previous cardmakers virtual retreat.
We each took the concept/sketch of an envelope card and made one sketch 3 ways for this event.

I like it so much that it was time to bring it back and use some current catalog merchandise.
Lets talk about paper and triangles for a moment. See how non-symmetrical my attempt is at a triangle on the plaid paper is on the before card. The after card gets a fix!
First, I’m going to focus on the sketch and a better approach to a beautiful triangle flap!
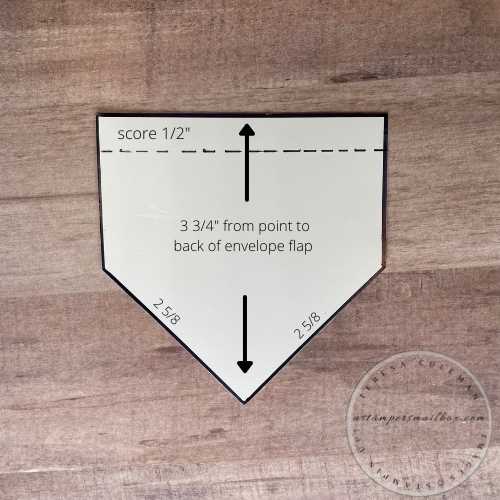
Triangles are tricky! Using my Zero Centering Ruler made getting this template onto paper a bit easier. To keep the above sketch from being too ‘busy’, the width of this size is for an A2 card.
Let’s make one together!
-
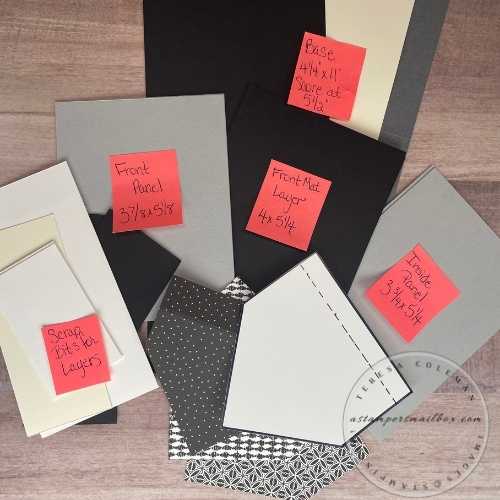
Base: 4 1/4″ x 5 1/2″ Score at 5 1/2″
-
Use an office supply 1/8″ hole punch to ‘snip’ a half punch in the middle of the fold end.
-
This is for your twine or embroidery floss.
-
-
-
Mat layer: 4″ x 5 1/4″
-
Front top panel: 3 7/8″ x 5 1/8″
-
Inner Pocket Panel: 3 3/4″ x 5 1/4″
-
Designer Series Paper/Patterned Paper: Follow Sketch Above or design your own! It doesn’t have to be a triangle.
-
Scraps for Layering
-
Save those corners and bits of Designer Series Paper/Patterned Paper from cutting the envelope flap layer.
-
-
Twine or Embroidery Floss: 14″
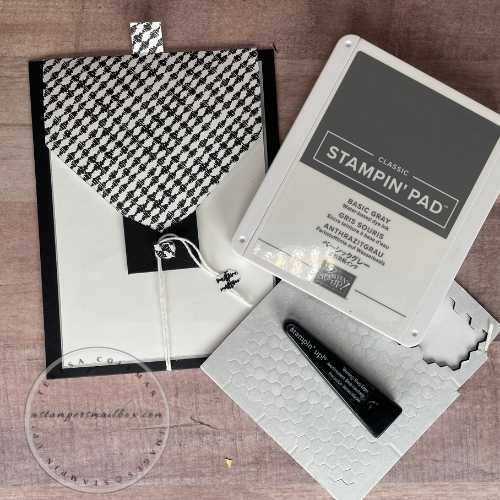
Like Lay’s potato chips, I couldn’t stop at just one ‘after card ‘ for this Mailbox Monday Makeover! I kept to the black & white theme because I love, love, love this host reward paper pack. You’ll find it in the back of the Annual Catalog – Pattern Party Designer Series Paper. I’ve used it in several recent projects and it’s a fabulous collection of patterned paper. The black & white make for sharp cards – I did add some dark grey to balance the contrast a bit.
I used alot of stamps for this series of Envelope Flap cards.
I hope some become part of your collection soon too!
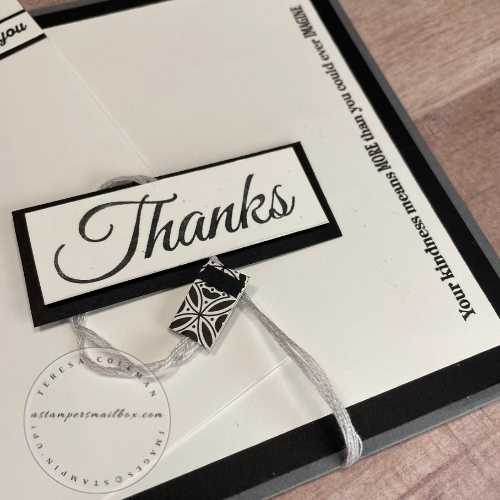
I’m starting with this one for detailed project photos because of the 4 cards I made- it’s my favorite. I started with the ‘bonus double envelope card’ thinking it would be my ‘makeover card’ but this one really hit the fav factor for me.
Funny, because it was the last I made during the crafty session for this article.
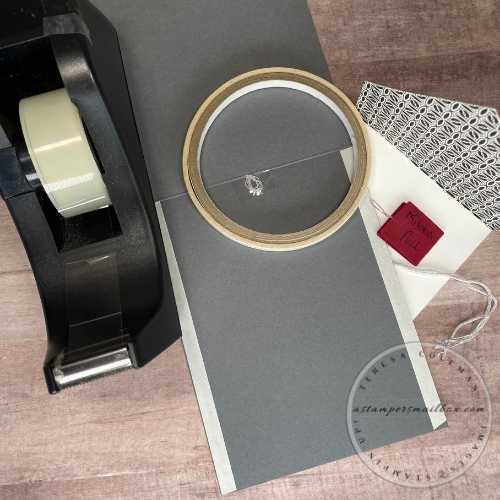
See the light grey loop of twine inside the circle of tape? That is where I ‘nip punched’ a tiny notch out of the fold edge. Using my DIY ribbon pull I pulled the loop through the hole and taped it inside. This secures it well and it won’t be seen as the card is completely adhered closed to become a top opening pocket. ( This is light silver/grey embroidery floss – not twine)
Fatigue was setting in after a long day and a good crafty session – 4 cards and one big mess:) so, I thought I would try tear-n-tape for this last card of the night. I normally use a ruler and a thin line of Multipurpose Glue because it allows the width/ space inside to be wide enough for the inner panel. Welp, cue the OOPS – by using 1/4″ tape silly girl = loss of 1/2″ width inside panel width space therefore I had to cut down the inner panel and envelope flap. whoops… You will notice it looks more narrow than the others- shrug- it all worked out in the end and it really is my fav of all of them.
Moral of that paragraph- if you want to stick to the dimensions stated above – run a very narrow line of liquid glue along each edge, close the card and burnish with a bone folder to really adhere the cardstock together.
Measurement Changes for this Card: Base: Same 4 1/4″ x 11″ Score at 5 1/2″ snip notch in middle of fold with handheld office supply paper punch. Inner Panel: 3 3/8″ x 5 1/4″ , Basic Black front mat: 4″ x 5 1/4″, Whisper White top mat: 3 1/2″ x 4 3/4″
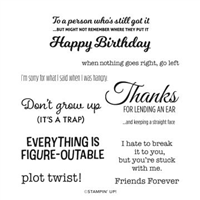
I used 3 sentiment sets for the making of this card… please know, you don’t NEED this many stamps sets to make a fun card. I have a love for greeting sets and sometimes I grab a stack!
A Black Stampin’Write Marker is available as an individual marker and is a great tool to isolate single words or sentiments. ‘Thanks‘ is from the stamp set ‘Lighthearted Lines’ and the ‘Your kindness…” is from Many Messages and the inner greeting ‘The World Needs…’ is from Many Happenings stamp set. These sentiments come together for a fun card.
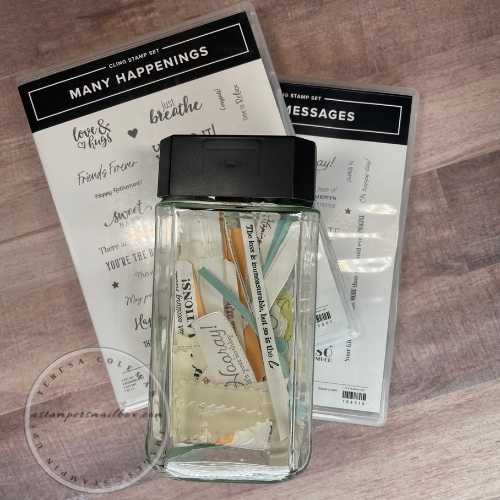
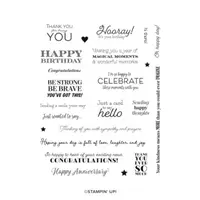
These 2 sets are actually large single stamps with a BUNCH of greetings that have one coordinating die. Stamp all at the same time then die cut all at the same time. BRILLIANT.
TIP: Grab a jar or container, stamp these in several colors ( highly recommend a stamp positioning tool like the Stamparatus for these stamps) then have one die cutting session. Toss all your sentiment strips into the jar and you’ll loads of great greetings ready to be layered onto your cards or tags!
I grabbed my jar of greetings and layered this one on the inside. I wasn’t brave enough to try to stamp after I had the whole card together. This worked perfectly! I traced a second piece of patterned paper to cover the colored side of this Host Reward Paper – Below you will see it retail priced at $18.00 but its FREE for Hosts!. Click this link to learn more about hosting!
_______________________________
Now to bring it all together!
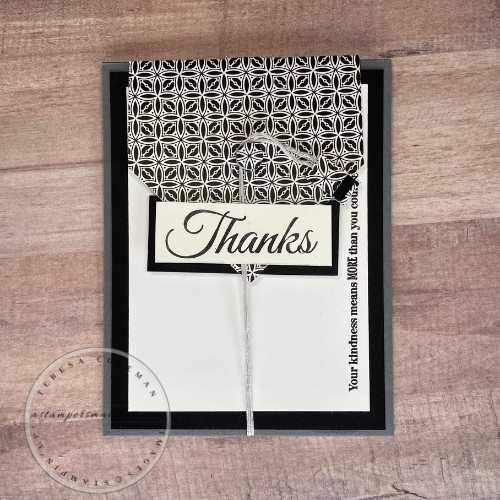
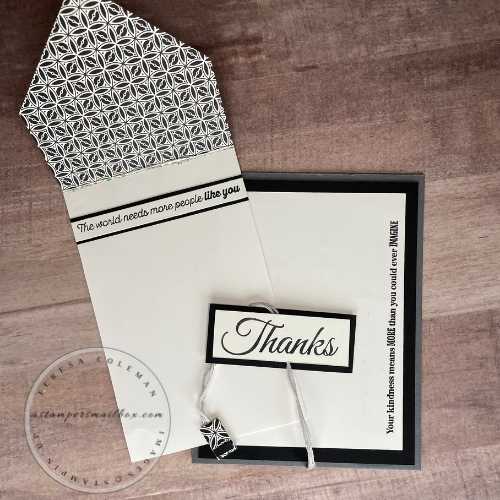
Here is the finished after card again to refer back to as I describe the front elements that hold the envelope flap down.
A bit of recap first: I used embroidery floss because I like the light grey color and it twines easily around the nearly invisible dot element on the flap. The grey floss goes through the nipped notch in the fold, taped inside before the card is glued together to create the pocket at the top.
Next, I focused on the Thanks element. I made it so that it slides up and down by cutting a strip off of the Stampin’ Dimensional sheet edge and placing a foam strip only on the right/left edge. Place the grey embroidery floss onto the black cardstock then adhere the Thanks layer. The width of this allows the point of the envelope flap to tuck into.
Bittie details: I took a punched a tiny circle with those saved bits of patterned paper. Then layered 2 mini black dimensionals together on the dot then to the envelope flap. With this pattern paper that added circular element almost becomes invisible. The stack of 2 foam dimensionals is enough lift for the embroidery floss to twine easily around it.
For the twine tag element: I cut a strip from that scrap bit of patterned paper with a strip of Tear n Tape place the ends of the floss into the tape. Pinch that closed. OH, I added tiny strips of black cardstock for an added touch of contrast.
TIP: On the tag elements: I have found that layering another strip of the adhesive down before pinching the strip of paper closed helps it to stay put!
________________________________
The rest of the cards follow the same format and assembly.
My descriptions will be much more brief!
This Envelope Flap Card features a faux mini envelope closure with a square element for the twine to wrap around. All the cards have a pull tab on the inner panel as shown on this card. Even the favorite above- not shown in photo 🙁 – it must have gotten tucked down when I took the pictures…
How to cut the tab: the card below shows the finished look of the tab area once you’ve applied it to the inside panel. Note, I forgot to take an earlier photo so the tab photo below is of the polka dot card:)
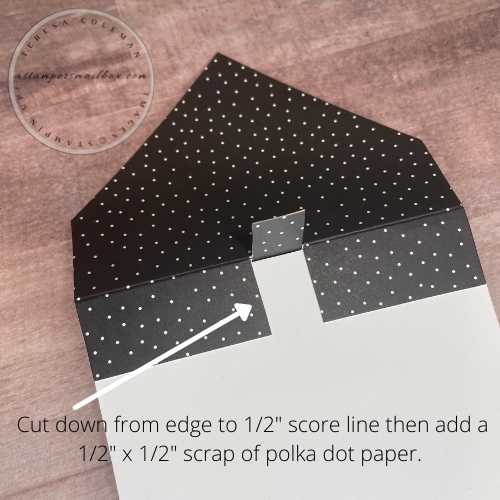
I stamped HAPPY from the stamp set Biggest Wish using the Stamparatus for perfect inking. This stamp took me 3 ink applications to get the nice crisp image I wanted.

Here’s a closeup of the mini envelope.

By taking a strip of Basic Black cardstock 1 1/4” x 2 1/2″ then banner cutting the ends and using some angled scoring – it gives the illusion of an envelope that the flap point tucks into nicely. I cut some narrow strips from the Black Mini Dimensional to give lift for the flap to fit in. Following the same technique of double stacking Mini Dimensionals and a scrap square of patterned paper adhered to the front of the faux mini envelope the white twine swings around it nicely.
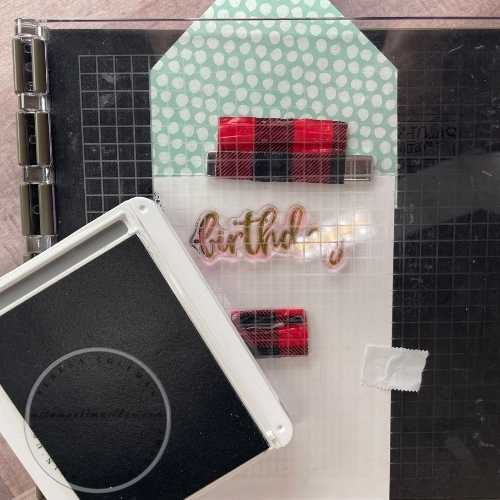
I used the Stamparatus on the inner panel to complete the Birthday portion of this Happy Birthday card.
___________________________________
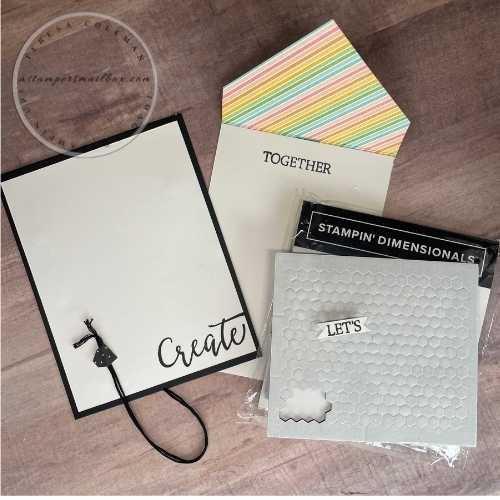
Now it’s time for a polka dot ‘Let’s Create Together’
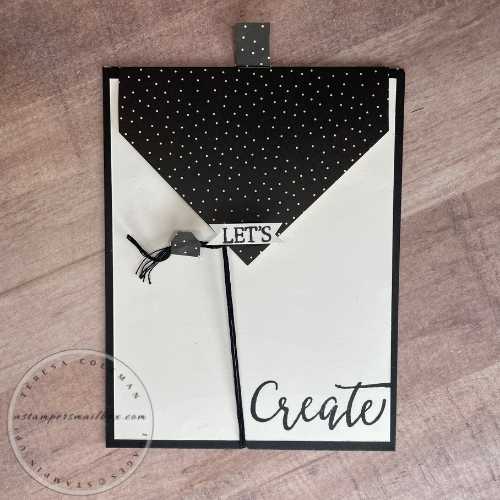
I kept this one super simple with the set Create With Friends stamping the words ‘Let’s Create Together’
I used 4 mini dimensionals for the ‘LETS’ twine wrap area. I used black embroidery floss instead of twine. Cute to simply highlight a word for this!

It comes together so nicely as a sweet & simple card for a crafty pal!
__________________________________
Bonus card: It’s a Double Flap! I had alot of fun with this! It’s brain wave intending to be the only ‘after’ card but as I got to working on the design and sketch for the flap I decided that it would make a fun bonus rather than the true ‘makeover after’.
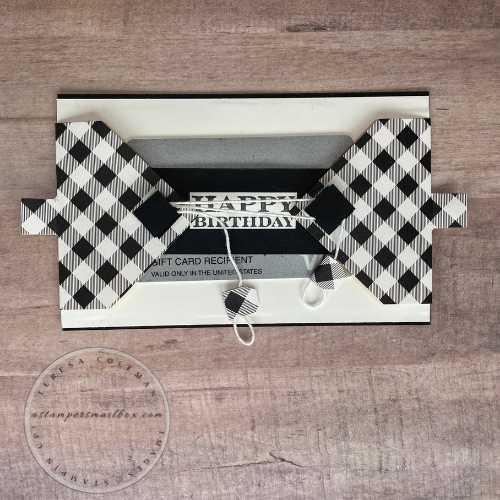
Double ended envelope flap panels with a gift card insert! Buffalo check!
LOVE this! For the twine wrapped areas – I wanted a bigger space for the white twine to wrap around so I cut squares to sandwich 2 layers of the regular sized black dimensionals.
Same cute tab elements on the twine as the others.
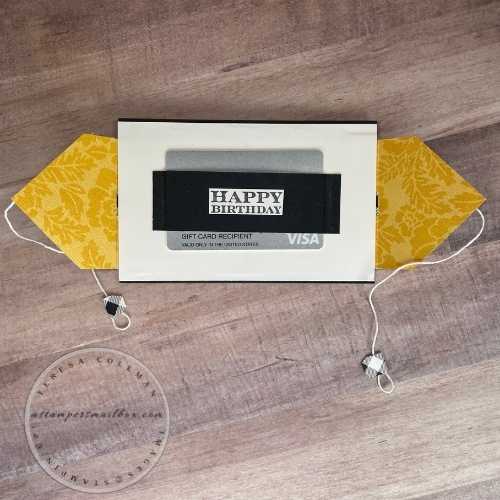
The yellow is so pretty that I decided to leave it. Cute huh?

For the Happy Birthday, I reached for my jar of sentiments again.
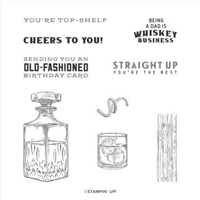
The Cheers to You is featured in the Whiskey Business stamp set.
The card making format is exactly the same only using slim line card dimensions.
Bonus Slim Line Measurements:
-
Basic Black: 3 1/2″ x 5 1/2″
-
Basic White: 3 3/8″ x 5 1/2″
-
each end is open for the inner panels to slide into. Glue a thin line at top and bottom to adhere white cardstock.
-
-
Double end insert panels 2 3/4″ x 2 3/4″ – need 2 count
-
Flaps slightly smaller: point end length: 2 5/8″ and width: 2 3/4″ otherwise follow same format as described above.
-
Card holder: 1 1/4″ x 4″ Tear n Tape on each end then use card vertically to slide in & out to ‘crease’ the black cardstock to allow the gift card to fit nicely yet still easily be removed by recipient.
-
Black square cardstock for twine wraps : 1/2″ x 1/2″ again with double stacked black dimensionals
-
Twine – white leftovers from a previous Paper Pumpkin kit.
Products used in todays Before and Lot’s of Afters Mailbox Monday Makeover Edition #2


Price: $18.00


