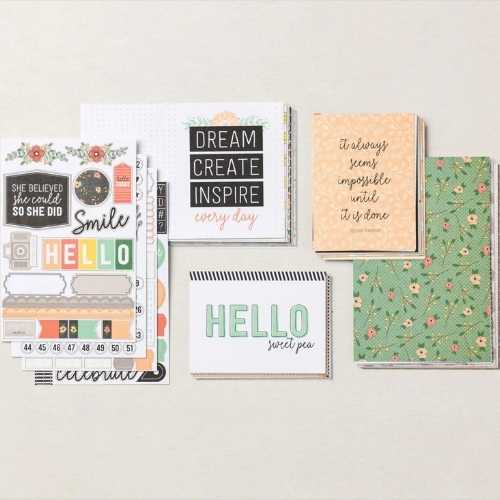
Inspiration is easy with Memories & More Card Packs and a Pause & Play gathering. Stampin’Up! puts together an amazing set of card fronts, mini elements, stickers and more in each pack.
This selection titled Today is the Day is perfect for the creative planner!
You can click on the photo to take you over to see this product along with another card making idea.
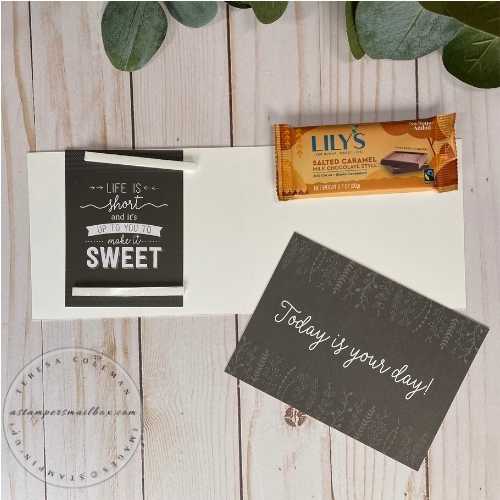
Today, I’m turning a card front and a mini element into a chocolate card! Well, not chocolate as in that’s the paper part:) a chocolate inside a card, ready for a hand delivery or a desk-drop for a colleague.
It makes the perfect cheer you up and sweeten your day kind of card!
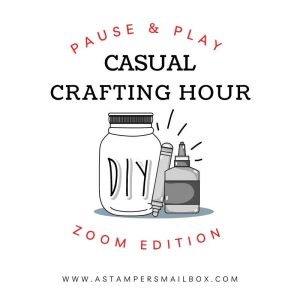
Pause & Play! That’s the title of my once a month gathering – it’s a fee based get together I host the 3rd Friday of the Month. Two events that are a quick one hour ‘pause & play’ in your day! The gatherings are at 3pm CST via Zoom and an in person gathering at 6pm CST. The fee of $10.00 gets you a Pause & Play packet that has a variety of paper items to have fun with.
Another version of todays project can be viewed on Facebook.
May is a busy month with school ending, graduations and gearing up for summer – I didn’t have anyone sign up for my Pause & Play gathering so I decided to bring a live demonstration P & P card.
You can view it by clicking on the image.
I love these two panels I chose from the Card Pack stack. They are just right for a chocolate treat!
The Memories & More Card Pack Today is the Day is found on page 136 of the new Annual Catalog.
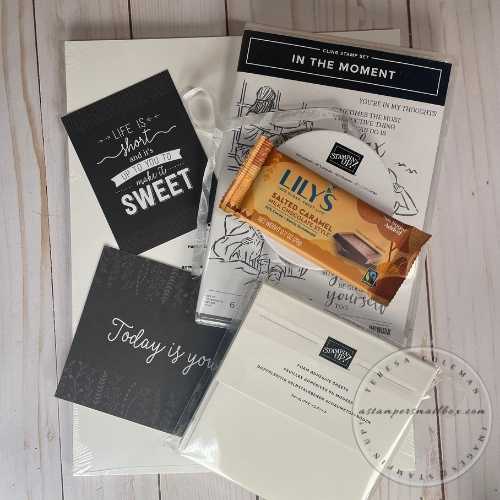
I’ve paired the Card Pack with the stamp set In the Moment because I think the greetings are perfect for when we need a little self-care reminder!
Gather your supplies and craft with me:
cardstock
paper trimmer
stamps & ink
front panel
panel for chocolate section
ribbon
____________________________
This is what we are making today!
A very Quick and very Simple (aka Q & S) card!
Pause & Play gatherings are only one hour – so with that in mind – I design projects that use easy to create with products, minimal stamping and quick assembly.
How to:
Using a Paper Trimmer: Cut your cardstock 4 1/4″ x 11″
Score at 5 3/8″ & 5 5/8″ This makes a 1/4″ spine to accommodate that yummy chocolate!
above score measurements are corrected 🙂
The Card Pack panel is bigger than my card base so I trimmed it down.
4″ x 5 5/16″
Ribbon of your choice: 24″ length
Foam adhesive- cut strips 1/4″ wide x 4 1/4 long ( that is the dimension of the product right out of package)
Use what you have!
Watch the video for more instructions! Along with some mistake fixing tips!
This goes together with minimal effort- some strips of foam adhesive and easy scoring of base card!
I love this sentiment!
We all know people that are so giving to others that they don’t really do alot for themselves.
Would you like to see another blog post with this stamp set?
Click on the image below!
The chocolate might not seem like much, but when a pal needs a ‘pick-me-up’
combined with this sentiment its just the thing!
I came across this Lily’s chocolate in this miniature single size at a local grocery store recently. We like Lily’s Chocolates because they are sweetened with Stevia rather than sugar, they taste great, have superior texture and really hit that low guilt chocolate fix! I will say- for the bakers out there- my personal opinion for chocolate chip cookies, I don’t care for them used this way. I find the chocolate takes on a bitter taste.
My hubby- he loves them!
Just some tips for you all that are wanting to cut some sugar out of your daily intake:)
Today’s video is a touch less than 30 minutes long- it makes the perfect card for a Pause & Play gathering!
I hope you can join me in July.
( The June event is cancelled due to scheduling conflicts. )
Did you notice: I fixed the card base as promised in the Facebook Live! I made an adhesive error during the live demonstration – which is not a bad thing! Nerve wracking for Teresa the demonstrator… But, good to show how to fix it! I should have put the handy Heat Tool in the product listing. It came to the rescue! What I did to fix: I used the heat tool to warm the adhesive strips – this allowed me to safely remove the outer panel and the inner panel. I then made a new card base. During the demonstration on Facebook the removal of the inner element went awry and I tore the base white cardstock. OOPS When this happens, I would rather ruin the base cardstock as this is easily replaced rather than the Memories & More elements. (whew) All fixed!
___________________________
___________________________
Happy Friday and a wonderful weekend ahead to all my crafty pals! Are you still loving all the newness of the annual catalog?
! I am !
Don’t forget when you shop online using my host code every order over $30 gets a M3 “Mailbox Mystery Mailouts”.
This month I’m featuring some In Color goodies along with some other fun crafty treats. One never knows what goes into these 🙂 they are mailed out the first week of the month following your ordering!
Ex: May’s M3 mailings will go to post office the first week of June.
Inky Hugs!
Teresa
One more photo.. like chocolate… a blog post can never have enough!!


