FYI*F* Envelope Fun Friday!
Templates, Templates & More Templates! FYI*F* Envelope Fun Friday is all about how to make Do-It-Yourself envelopes. In the recent weeks this has been a recurring them in the craft room so today, I am inspired to share it all in one place.
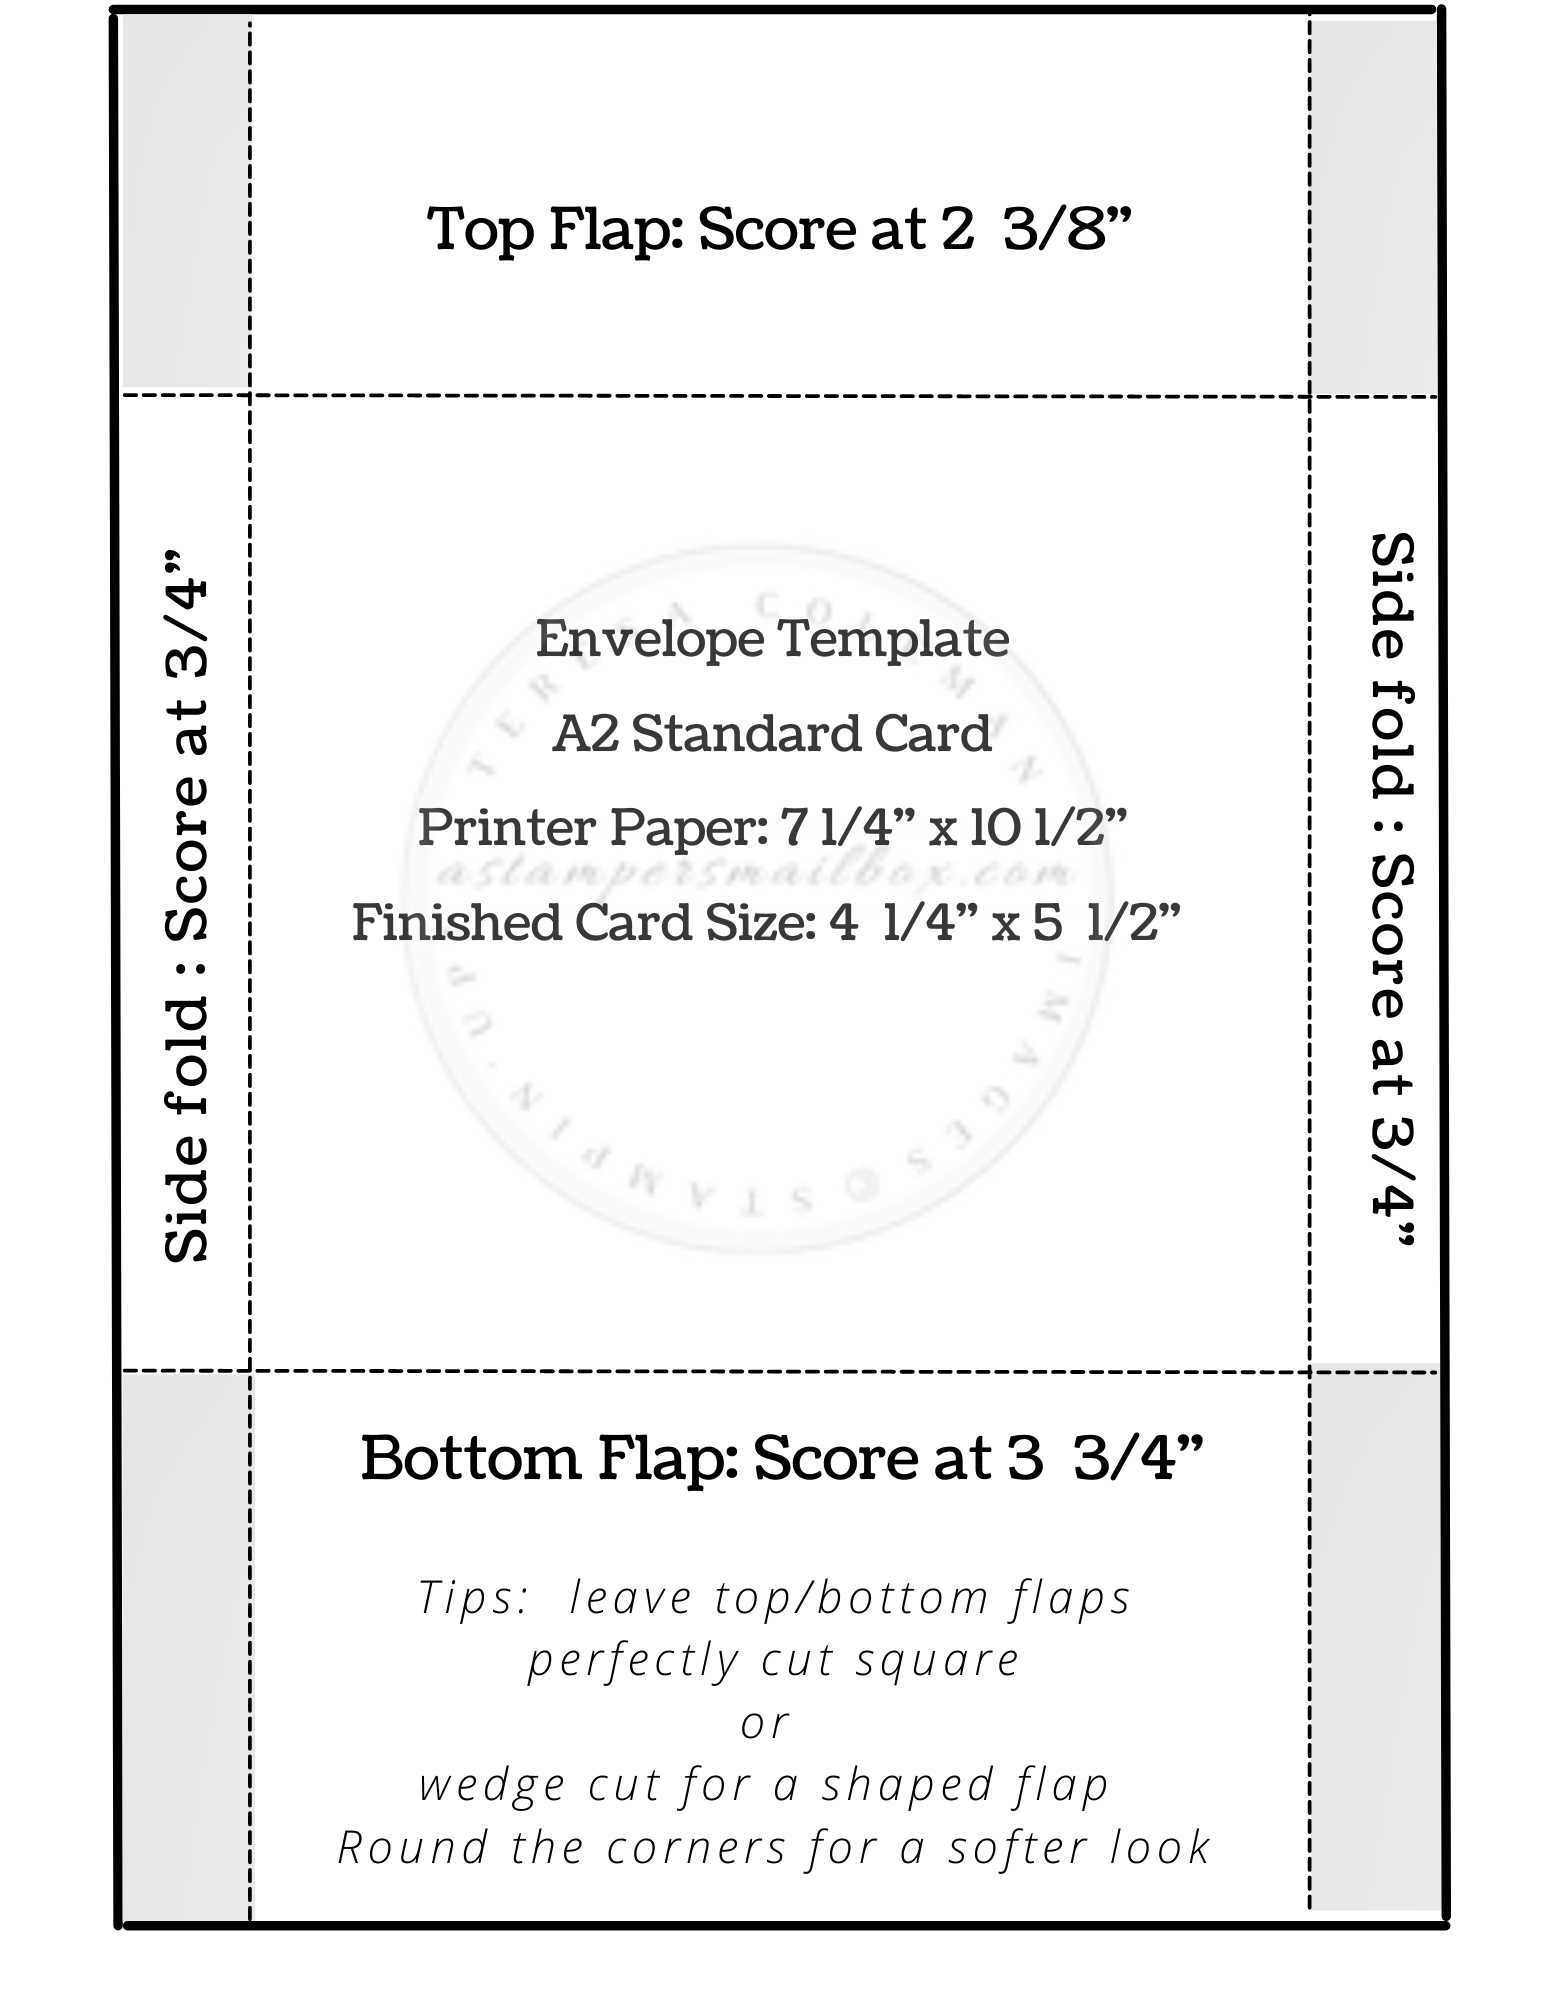
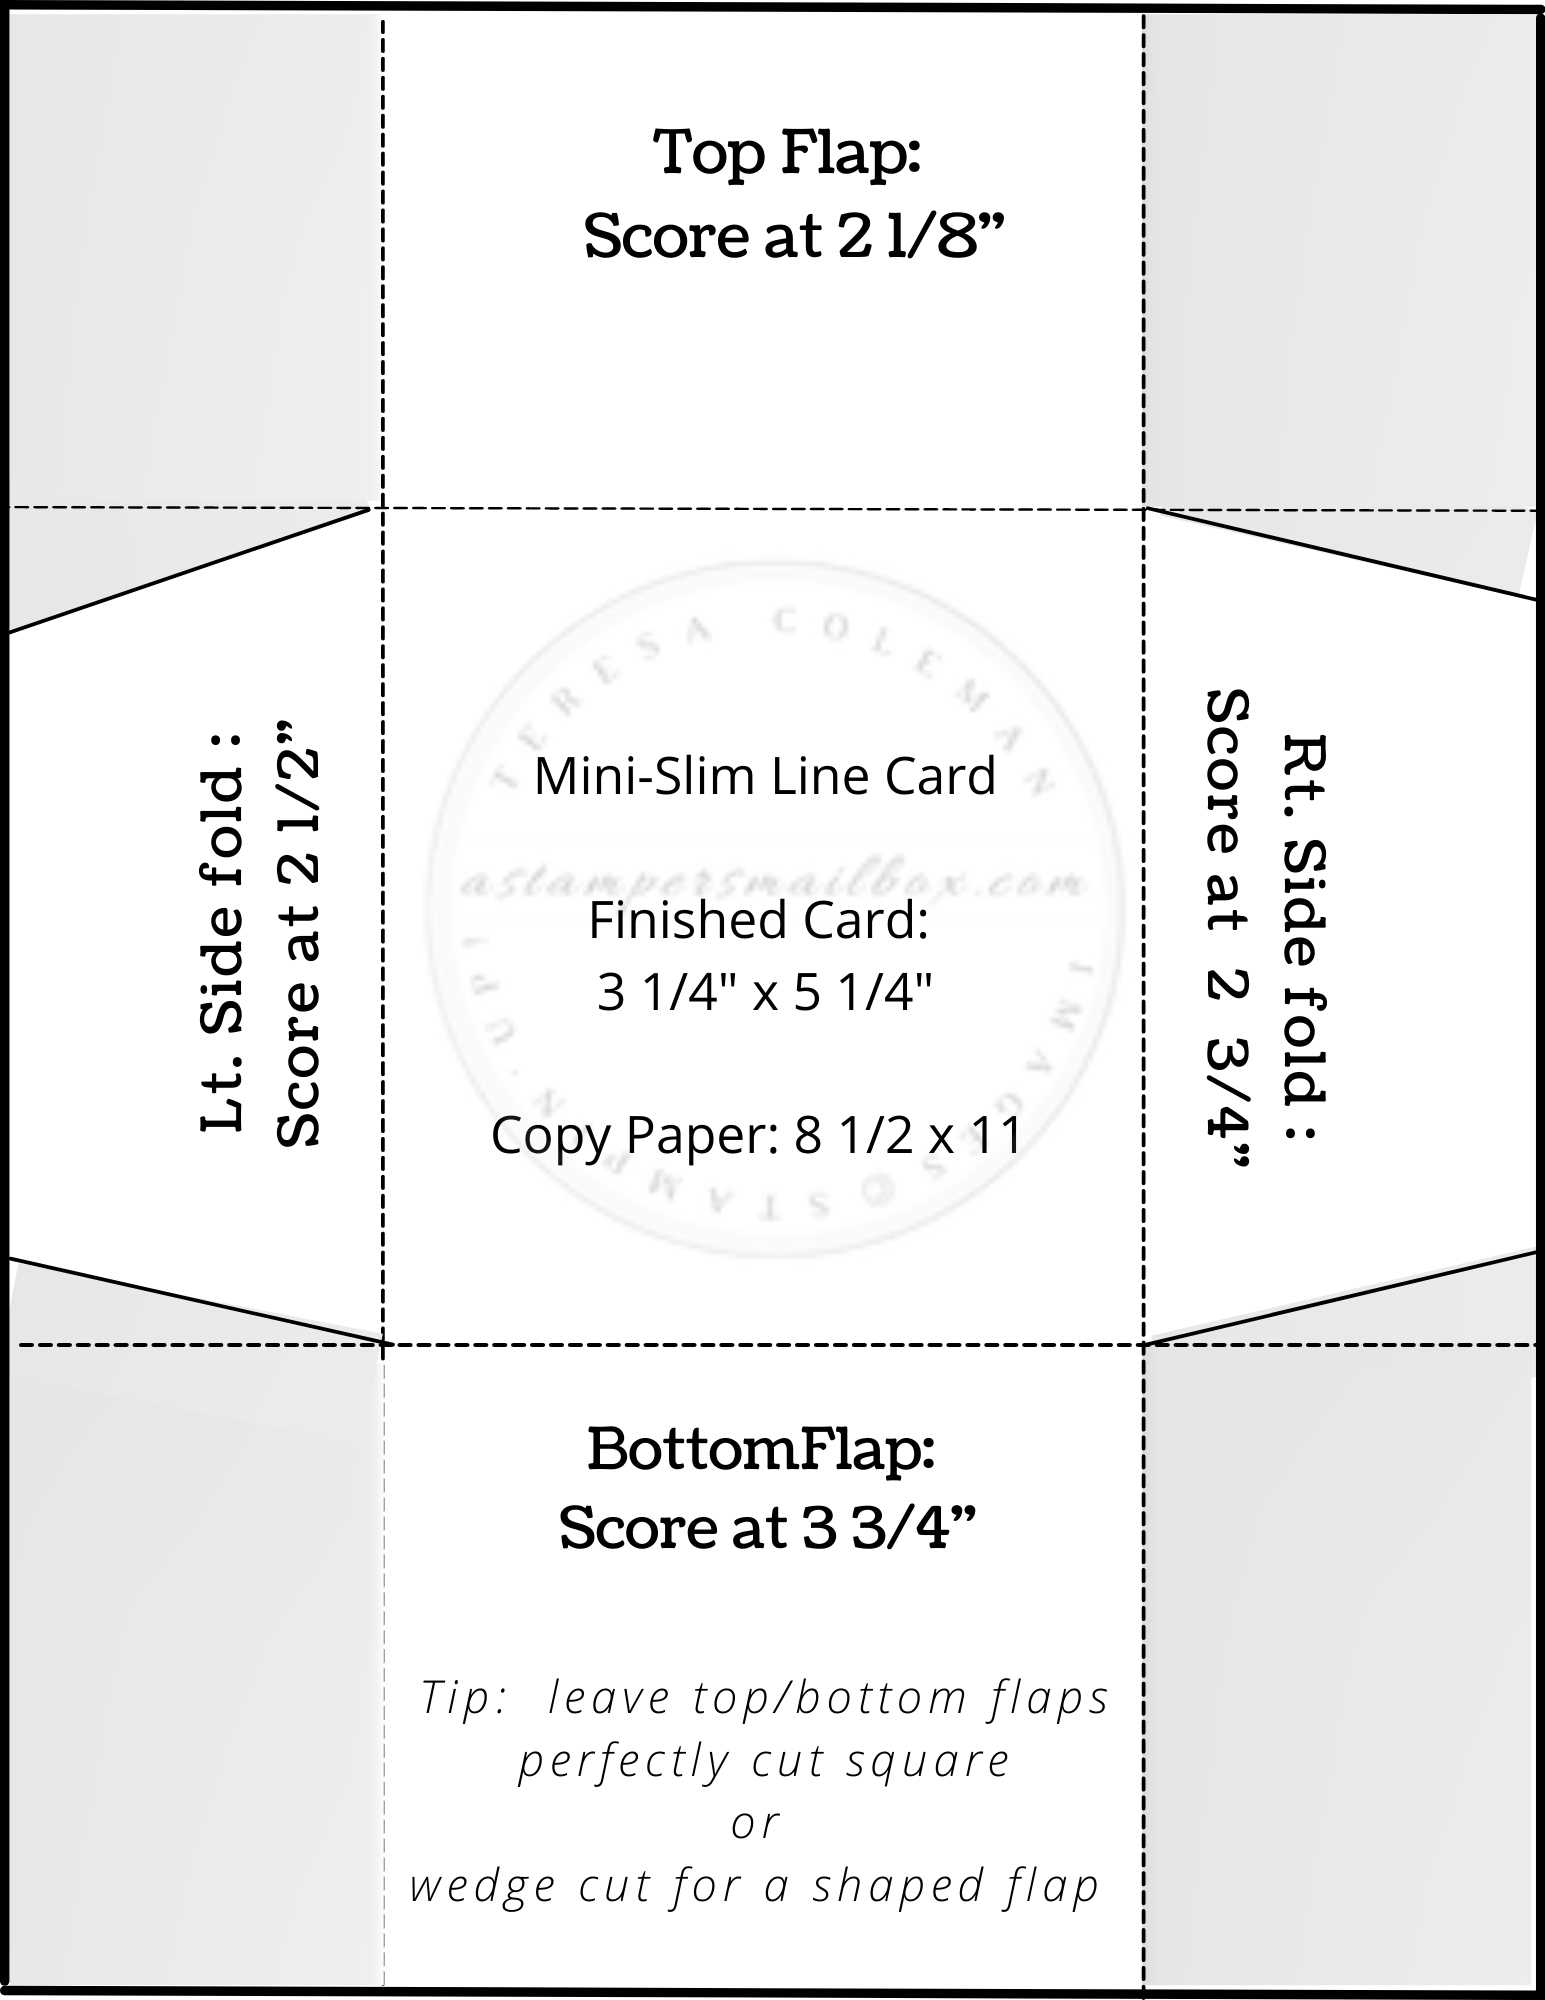
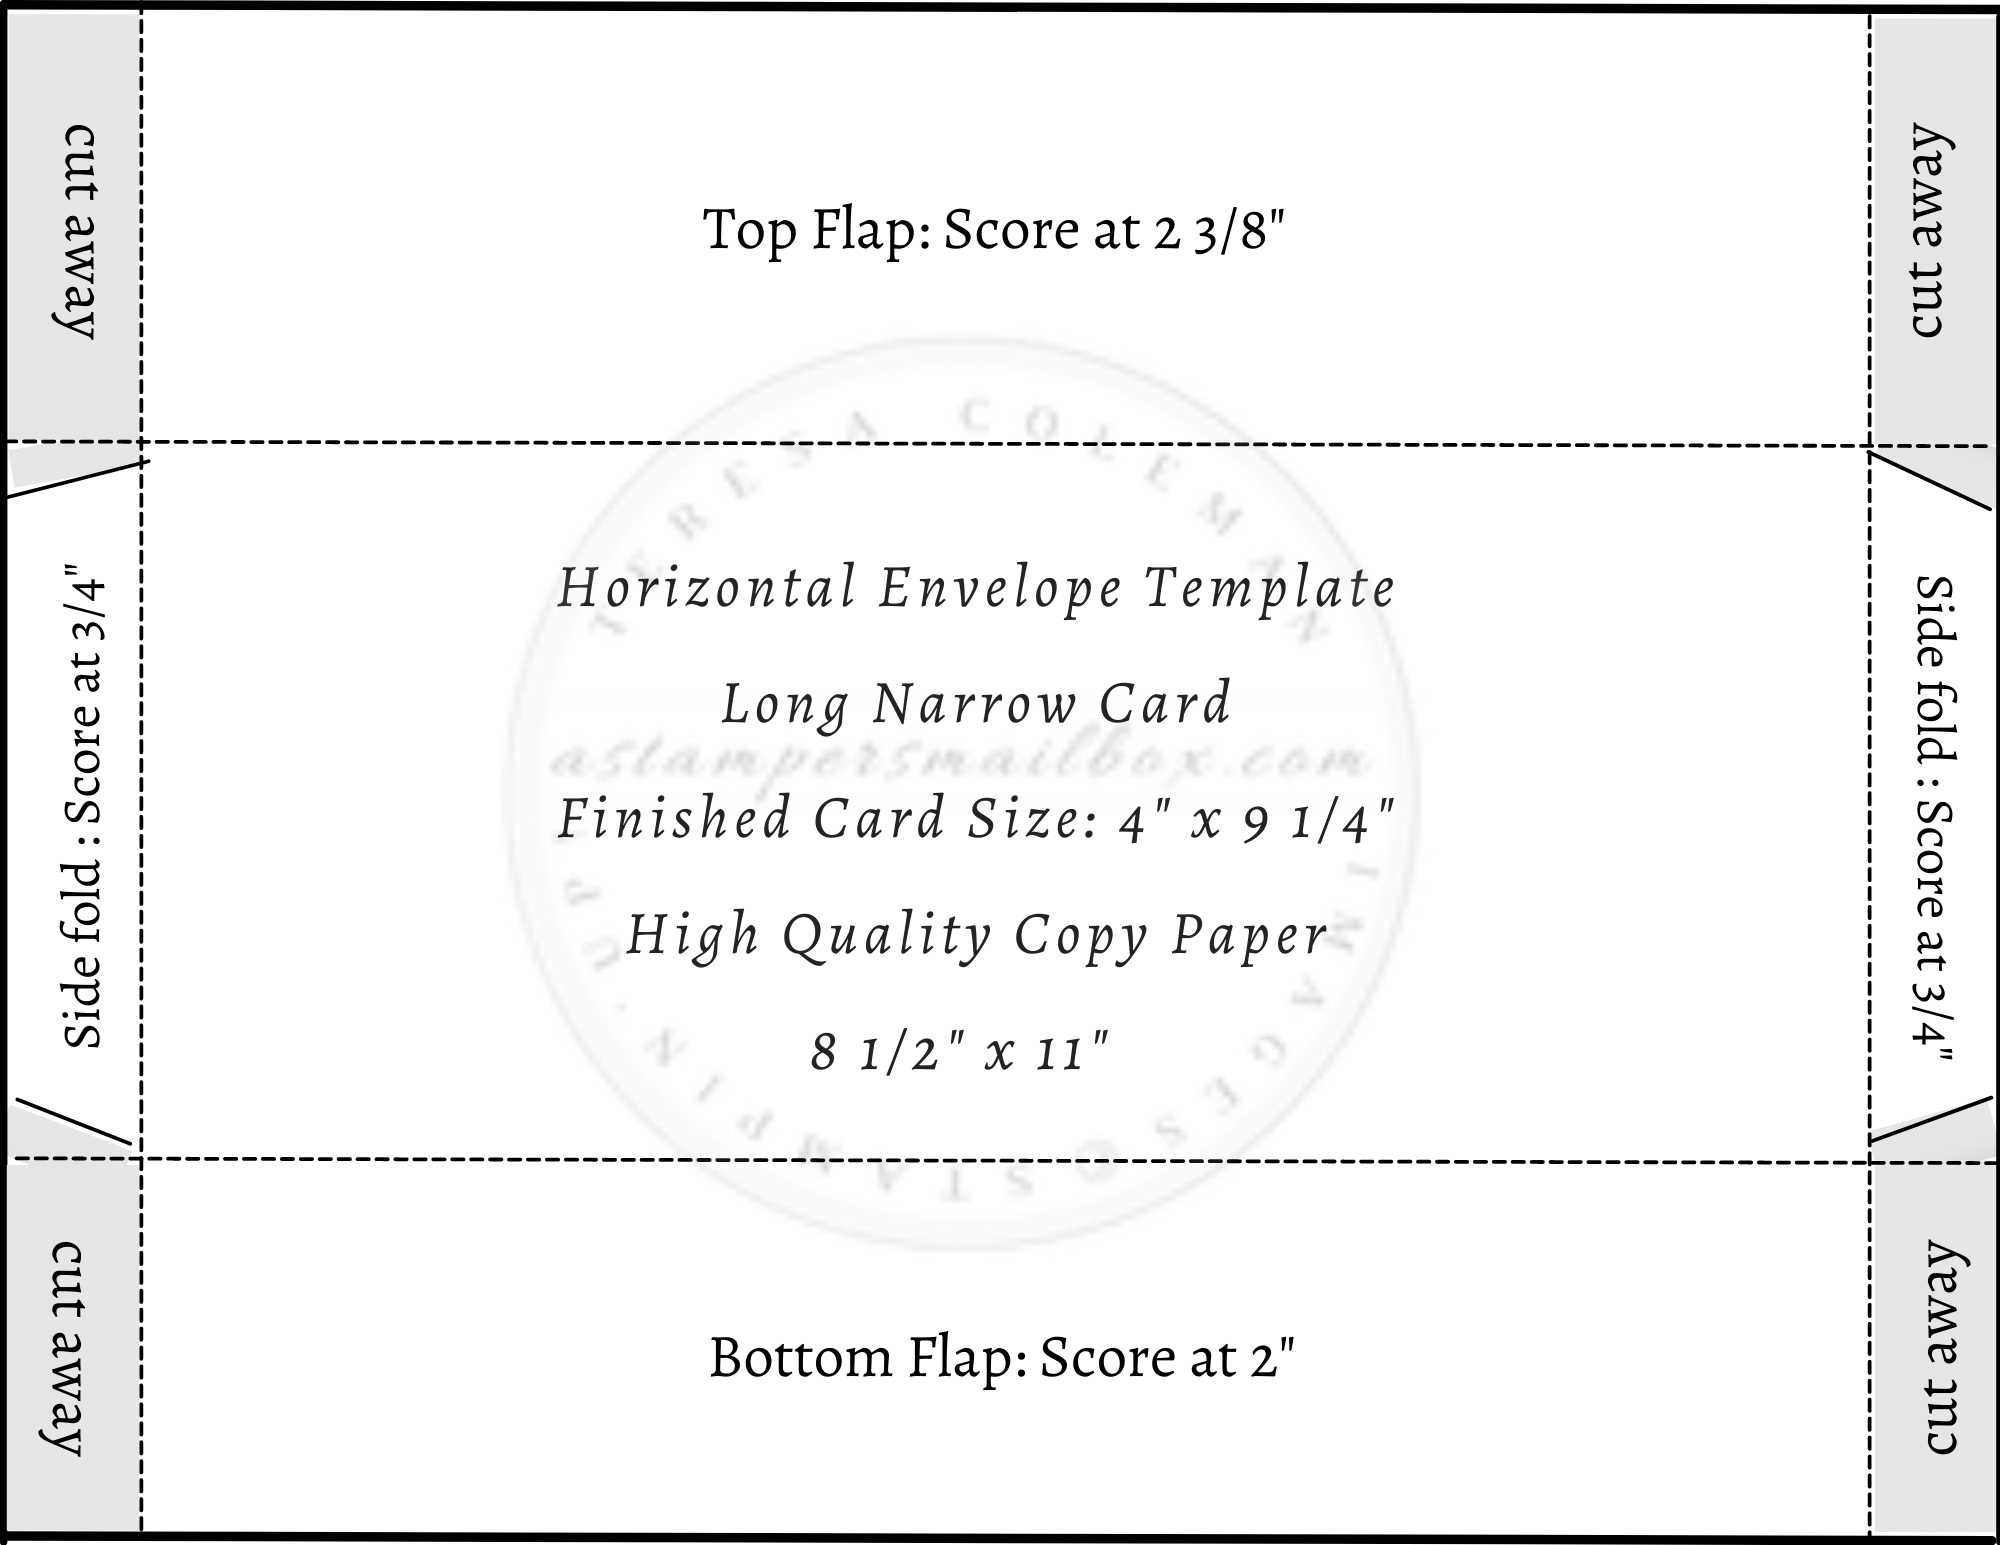
Today’s Templates are for these finished card base sizes and have a link title to click and open full size for easy printing if you would like to have a copy at hand. As well, when you click on the photo of the template, this will open a corresponding blog post.
-
A2 4 1/4″ x 5 1/2″ standard card base ~ in case you’ve run out and need to mail a card quick.
-
Square card 5″ x 5″
-
Mini Slim Card 3 1/4″ x 5 1/4″
-
Extra Tall & Slim card 4 1/4″ x 9″ (Horizontal / Landscape orientation)
-
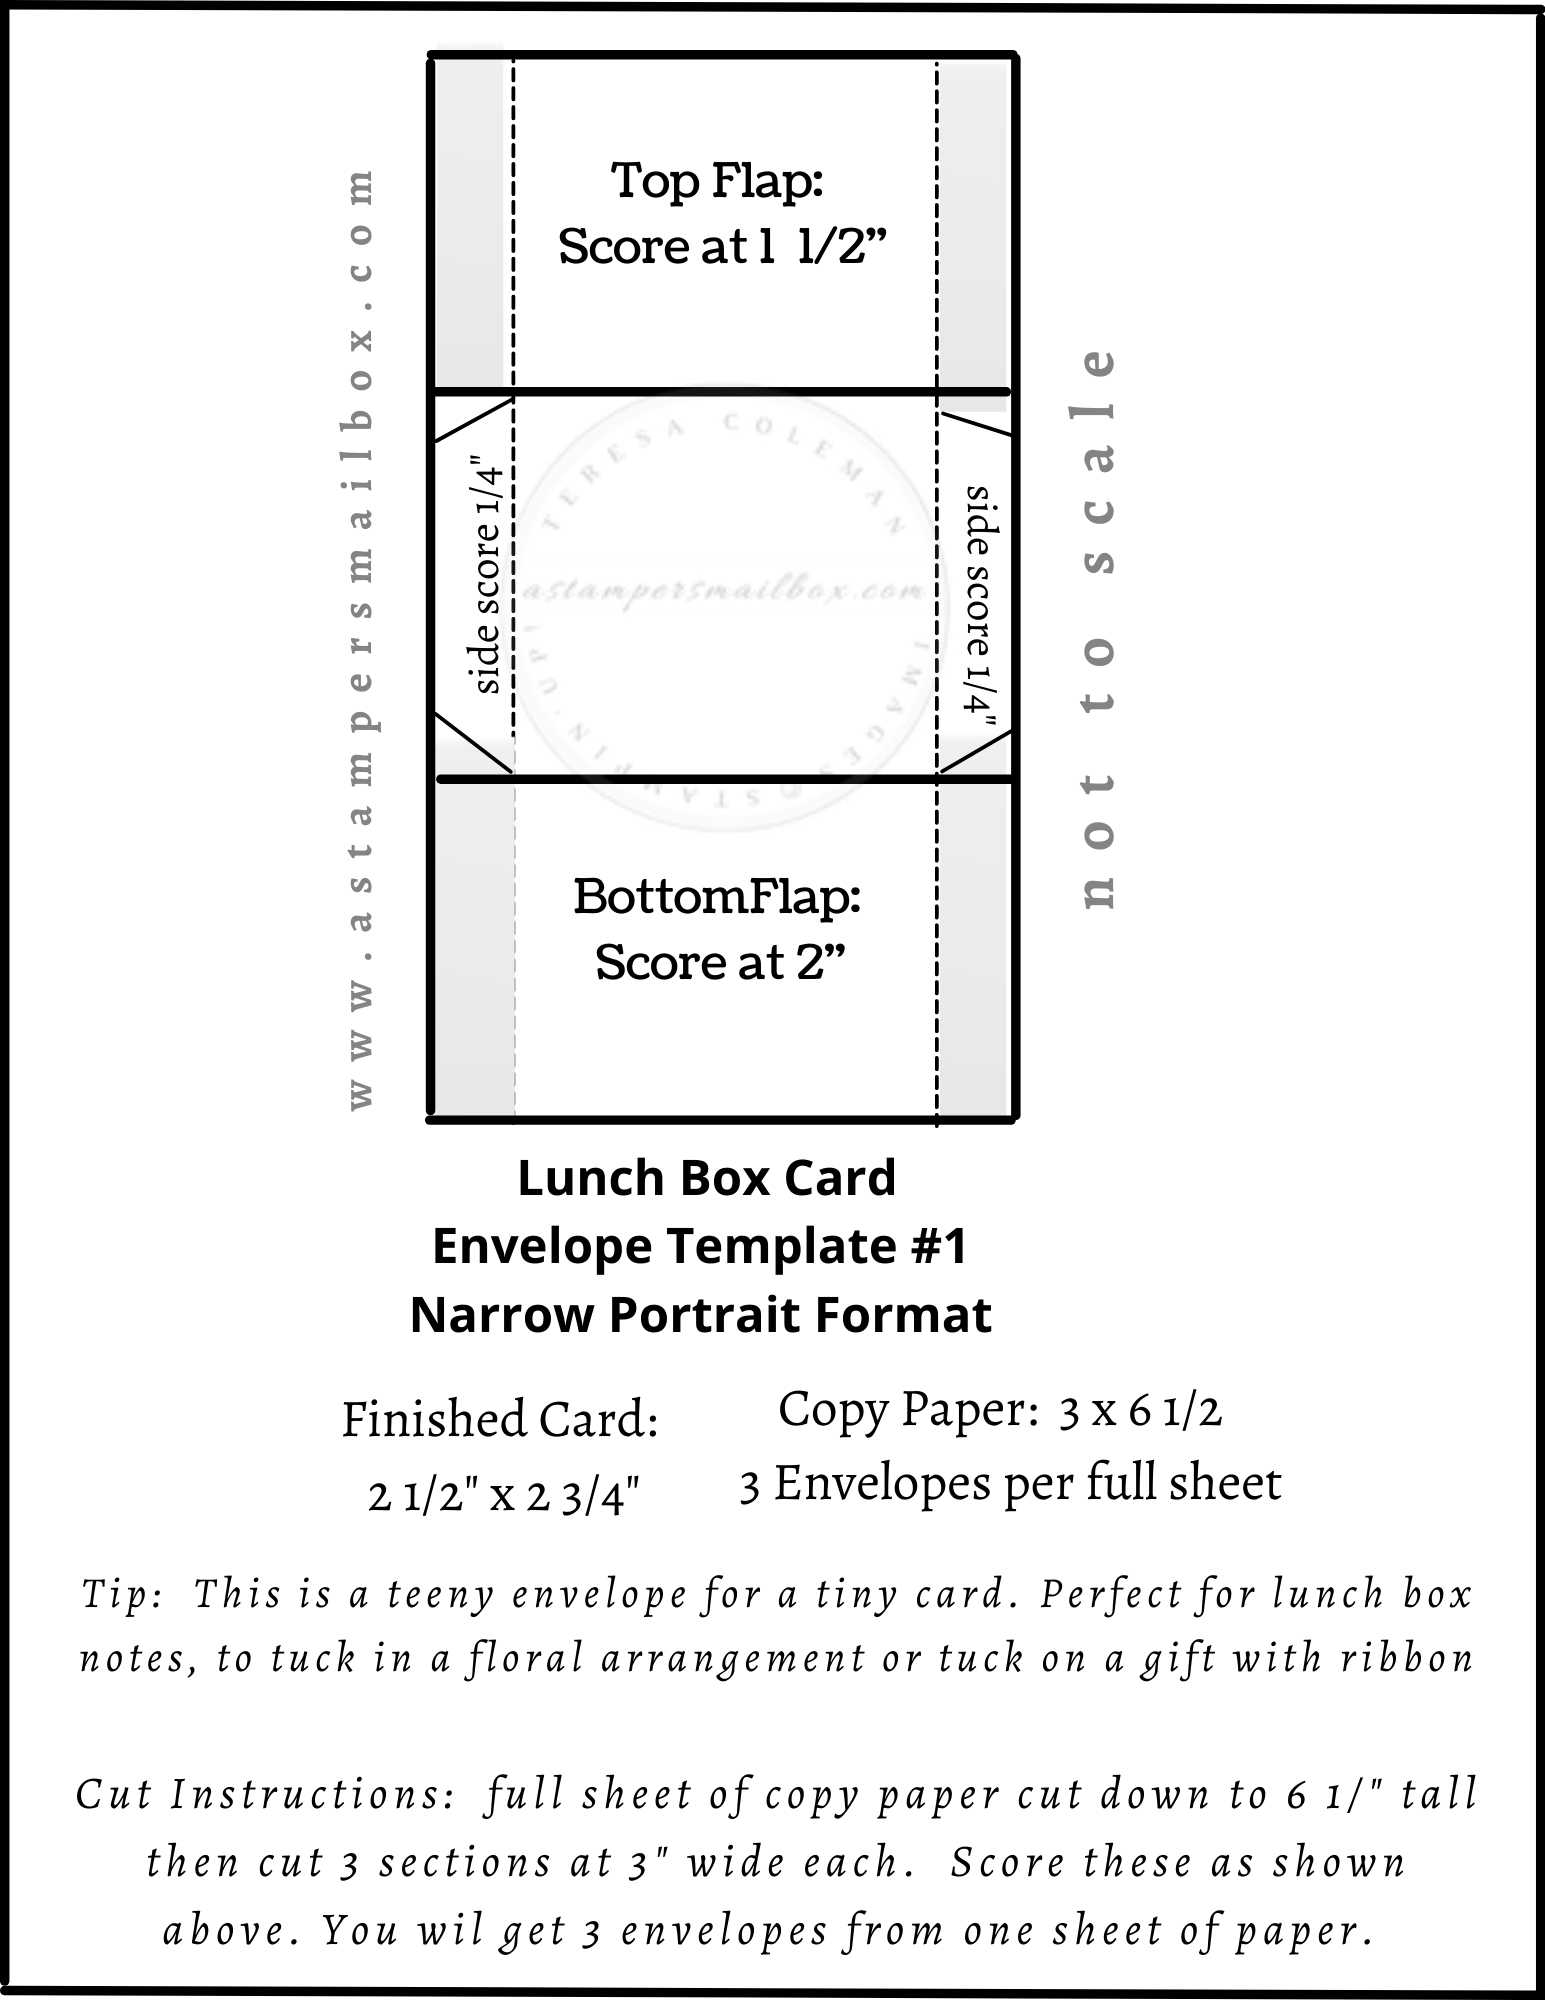
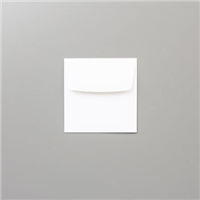
Lunch Box Notes card 2 1/2″ x 2 3/4 Template #1 is a narrow portrait style envelope.
-
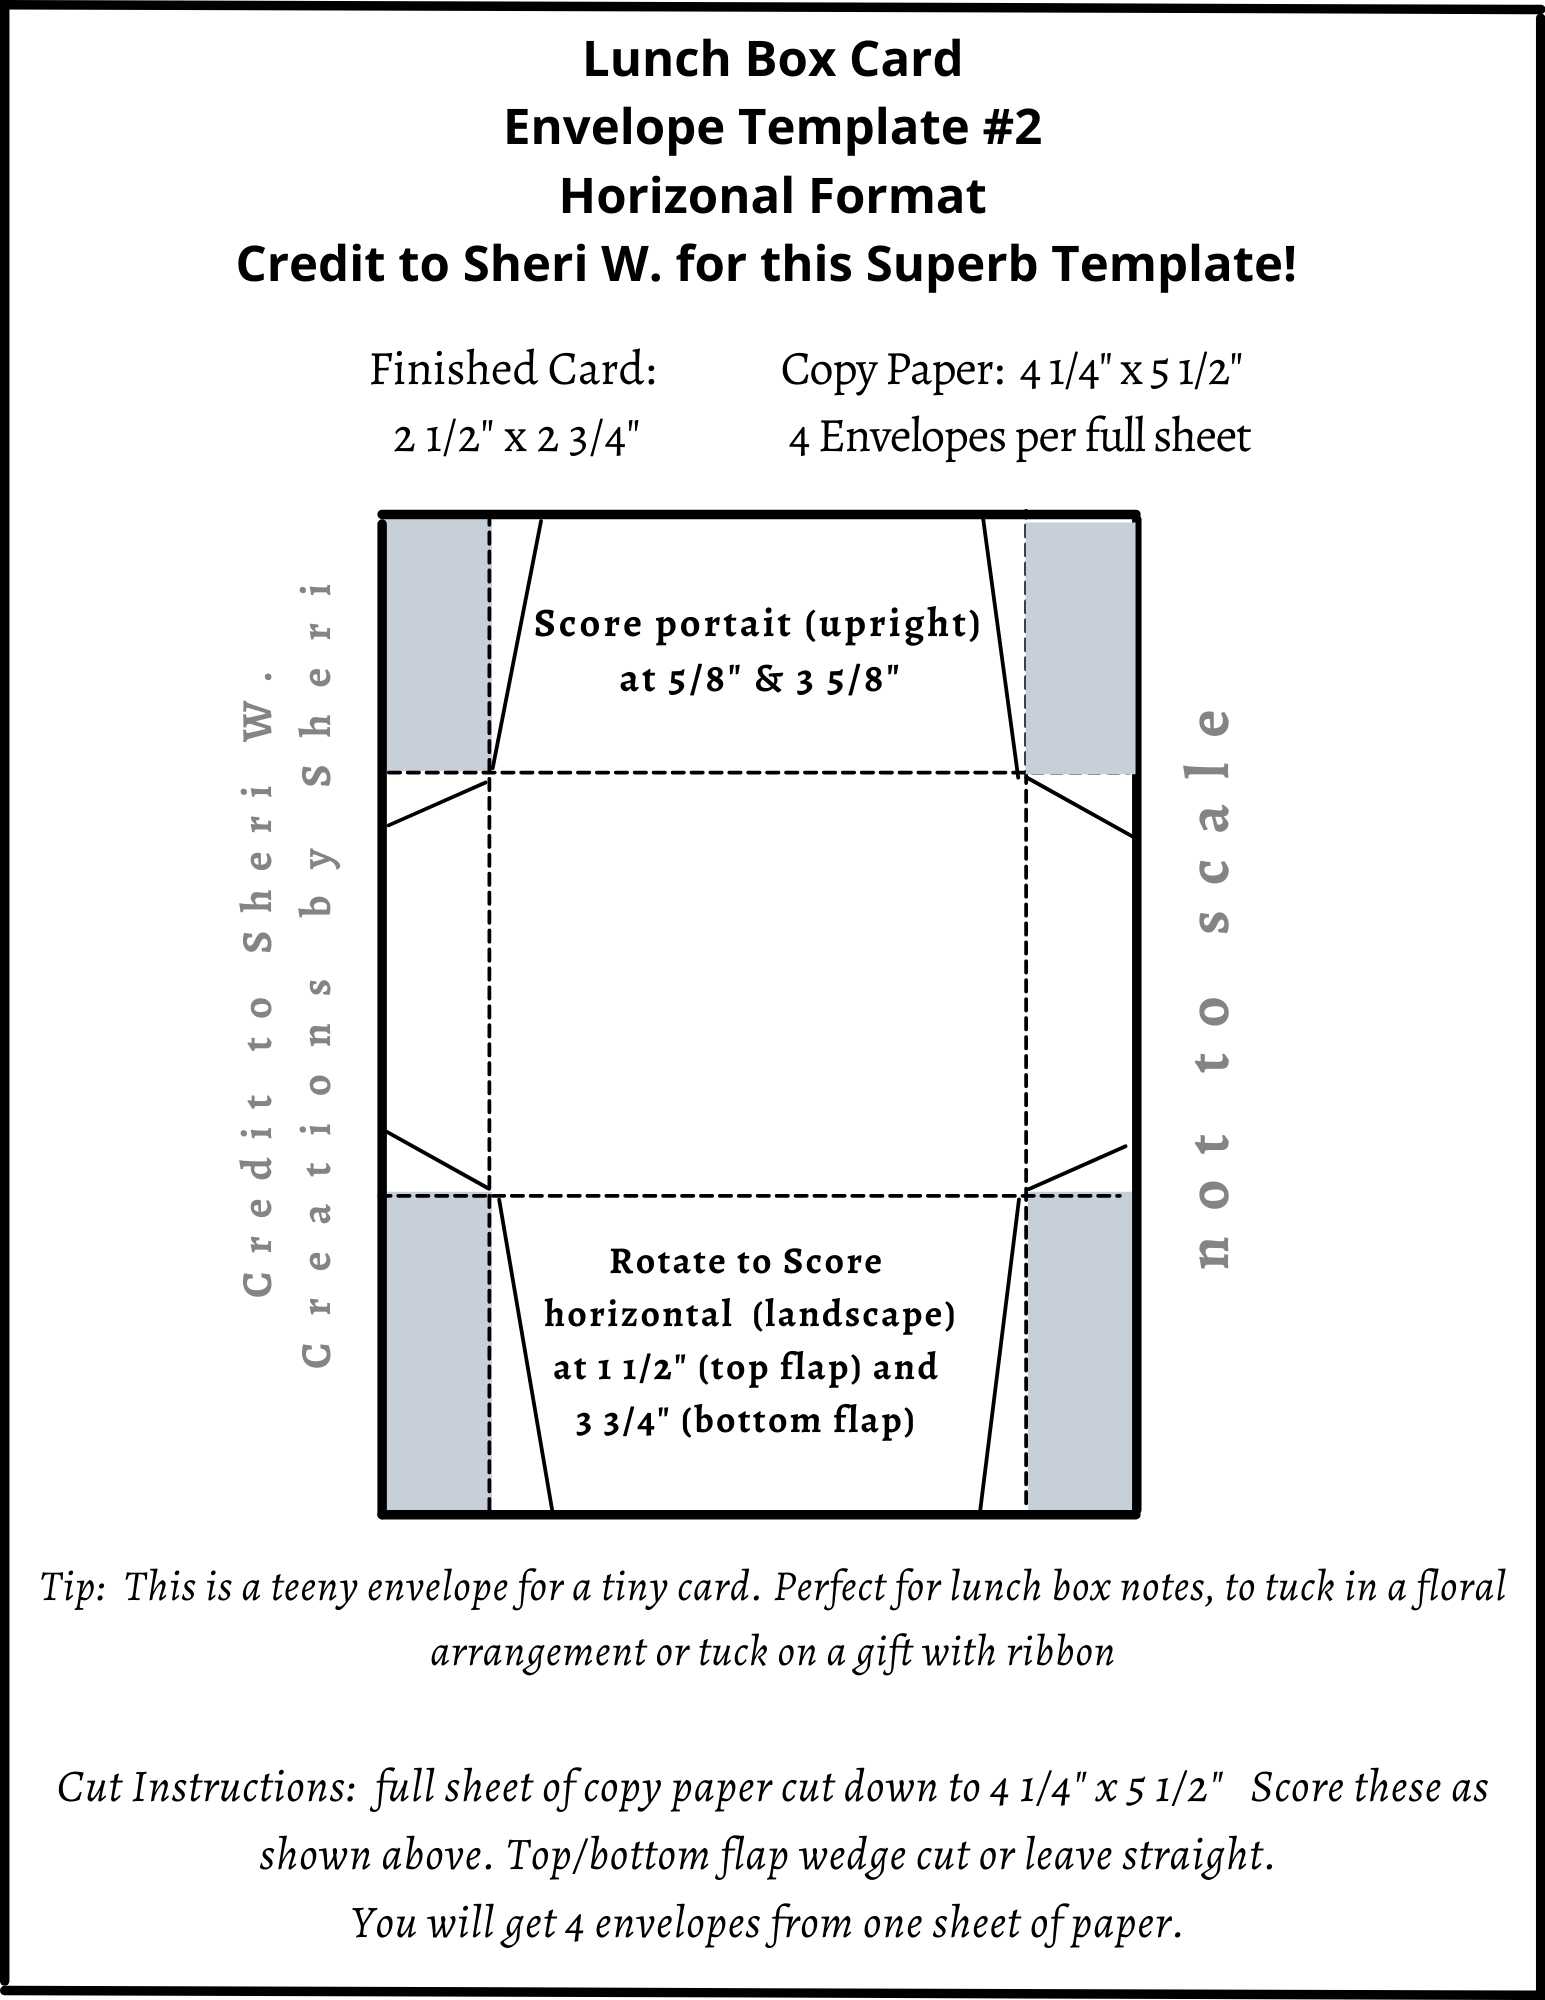
Lunch Box Notes card2 1/2″ x 2 3/4″ Template #2 Credit to my good pal Sheri W. is a landscape traditional style envelope – only tiny!
A2: 4 1/4″ x 5 1/2 Card: Envelope Template
Square 5″ x 5″ Card: Envelope Template

Mini-Slim Line Card 3 1/4″ x 5 1/4″ Envelope Template
Tall Slim Card 4″ x 9 1/4″ Horizontal Envelope Template
Lunch Box Card Envelope Template #1
Lunch Box Card Envelope Template #2
These adorable lunch note card templates don’t have a blog post yet – here’s a quick before and after photo for an idea! Watch in the coming weeks for some wee fry card fun ideas!
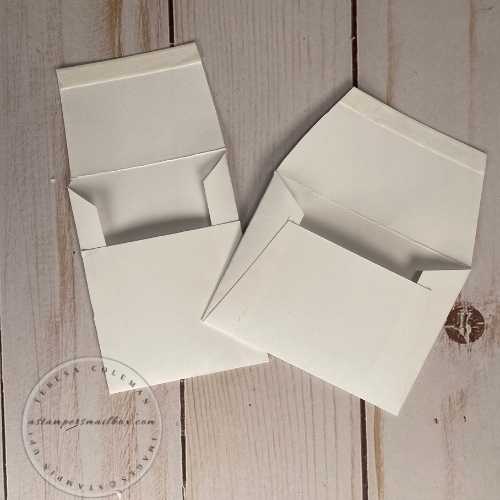
This photo makes me think ” Yawn, they look like any other envelope”… Well, yes but anything in miniature is stinkin’ adorable! The picture makes them look full size but they are just teeny cuteness!
On the left is the Envelope Template #1 and the right Envelope Template #2.
Putting them side by side allows you to see the shape difference better.
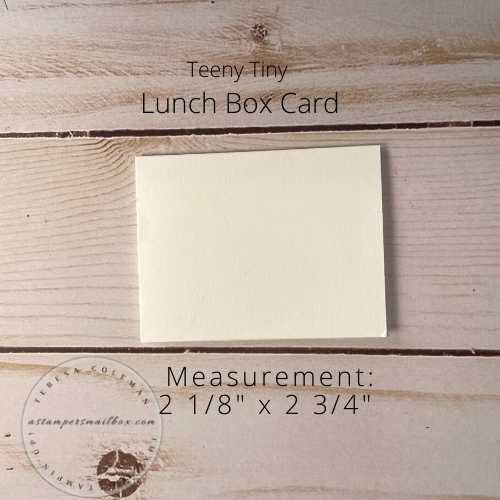
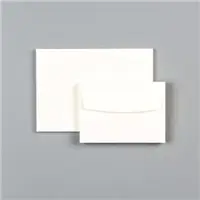
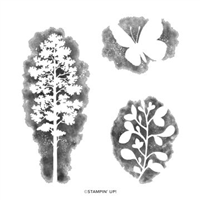
These are quick and simple to stamp – for this future baby gift card, I used the butterfly from the stamp set Amazing Sihouettes and ‘hello baby’ from the set Happy and Heartfelt.

A tiny card really allows the shape and size of this butterfly stamp to shine!
The Butterfly is stamped in Soft Sea Foam ink with the sentiment stamped in Soft Succulent.
Perfect colors for when we don’t know if baby is a boy or a girl!
_______________________________
Let’s talk paper – any lightweight paper will work for envelopes.
I prefer a really nice printer/copy paper with a nice hand feel.
I like the finished envelope to have durability yet feel nice to the touch.
This is the paper I’m using currently as it was easy to source on Amazon.
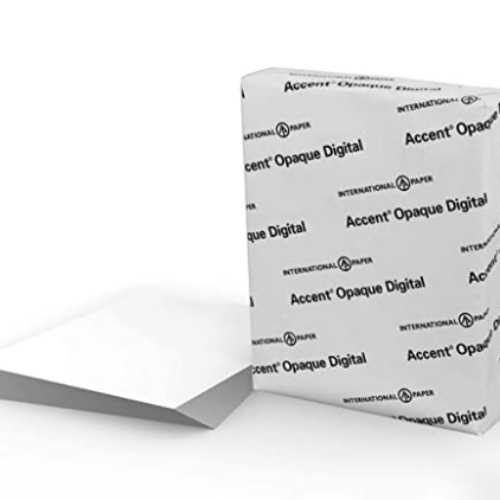
Accent Opaque White Printer Paper, 8.5” x 11” 28lb bond Copy Paper 500 Sheets (1 Ream)
Premium Computer Paper with Smooth Finish, 97 Bright, 104gsm – Multipurpose White Paper – 109363R
$ 9.12 Prime
Amazon also carries a Hammerhill Brand copy paper that is even higher weight at 32lb.
Prime available at $ 16.98
(as of today’s post)
________________________________
This is my local buying favorite for high quality printing as well as DIY Envelope making:
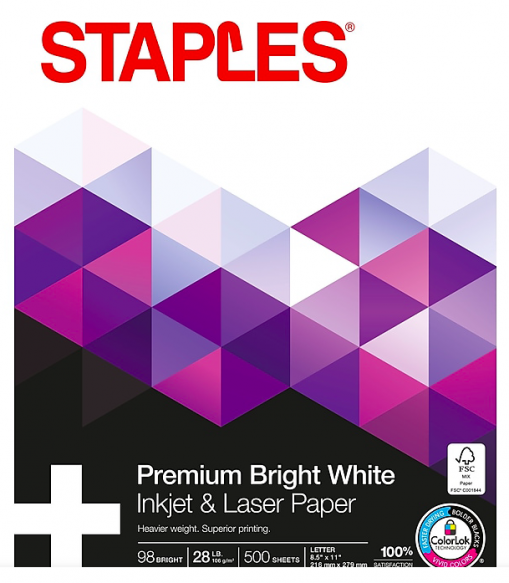
As of this blog post- Staples web site does not have a 28lb of their brand in stock – what they have is a 24lb of this same version. I believe it would work really well too. Today’s price is $17.79 500 Sheet (1 Ream).
Staples also carries a Mohawk brand of 28lb premium white copy paper.
I haven’t tried this brand- it’s listed at $1.00 more per ream.
___________________________________
Paper prices are going up- it’s good to have paper you really enjoy using even if buying a whole ream seems like too much.
I have found that the tactile difference when making envelopes much more enjoyable when the paper feels good to the touch. As well- this higher quality paper is much more opaque- your card designs don’t show through the paper as much as when you use a lower grade printer/copy paper.
Patterned Paper: yes, you can use Designer Series Paper for envelopes- I prefer to use the thinner papers for envelopes as they are lighter weight and therefore less expensive. The specialty papers- I don’t tend to use for envelope making – I reserve this good stuff for the cards!
Note: if you use a darker color patterned paper- the US Postal Service likes to see a white / sticker area for the address/return address portion.
______________________________________
One More Tip: Did you know Stampin’Up! carries clear envelopes? I love them- what I do is put my A2 size card in so that it faces front- I cut a piece of cheap copy paper down to 1/4 size: 4 1/4 x 5 1/2 – write the address & my return address on it. Slip this at the back of the card inside the clear envelope. Peel off the adhesive strip backer- tack down and place my postage stamp on top of the flap. I take a bit of “extra caution” and place a bit of scotch tape on the open corners to ensure that this card is making it safely through the mail.
________________________________________
Post Office Rules & Postage Pricing
Unique envelope sizes and clear envelopes all require extra postage.
Square, Clear & Mini’s envelopes are considered non-machinable.
As well, if your cards have alot of layers, foam dimensional lifted layers, embellishments – especially bows or ribbon knots all add thickness.
If your finished card is over 1/4″ thick- take the extra precautionary step of going into the Post Office to have them double check and put the postage on it that will help ensure your crafty work of art gets to the mailbox you want!
Let’s chat about adhesive a bit:
-
Assembling the envelope: I prefer a dry adhesive for DIY Envelopes because I don’t want liquid glue residue inside my envelope that I can’t see.
-
For the flap: I like a tape with a backer on it like Tear & Tape. I can completely finish an envelope and hold it over for later use this way.
Don’t want to make your own envelopes?
Here is what Stampin’Up! offers in the current Annual Catalog!
More to come in the next catalog! Make sure you are on my mailing list!!


Thanks for popping by to see what’s up on this fabulous Find Your Inspiration Friday!
Hope you have a wonderful weekend.
Happy Papercrafting,
Teresa

Thanks for pulling this all together!!!
Awesome resource, well done!
Thanks Sheri! Your encouragement and sharing your adorable Lunch Box Note design is so appreciated! We should collaborate again soon!! Happy New Week to you!