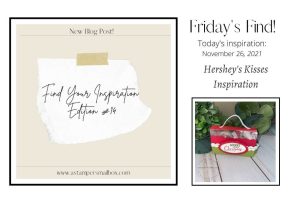
Find Your Inspiration!
Edition #3
I had fun with the ‘craft-gebra’ – ya, that’s a word: Craft + Alegebra. P=WC2. haha, just me having some sleepy sillies for catchy ways to describe this weeks concept prep. P= Post-its W=Wine C=Chocolate
Really, post it notes, wine and chocolate were used in the making of the project.
Post-its ~ What a great Non-Crafty Tool!
Watch for this Info-Graphic every Friday to see what’s up for Inspiration Friday!

Back story: We went to a restaurant called Pub W in Tulsa over Labor Day Weekend – lucked out and went during Happy Hour- Happy accident! They have alot of local craft brews on tap- hubs tried a Blond Ale by Tulsa Flag. VERY good! If you love craft beer, go check them out!
So- there goes the hunt at liquor store to grab a 6 pack for home right?
While checking out – I spied on the counter a cute chocolate set hanging on a wine bottle like a door tag. Who doesn’t like to combine chocolate & wine?
{The wine shown in today’s project is from Wilson Creek Winery in Temecula, CA. Last month on our vacation out we visited this awesome Winery & Vineyard. It’s a lovely location- worthy to put on your go-to list next time you are in SoCAl. Almond? Of all the delicious wines we had during our tasting this one flew home with us! Thanks again J & E and D & Y – we really enjoyed our time together!}
Woohoo, inspiration light bulb for this weeks Find Your Inspiration Friday!
What a great gift idea! Holidays, Girlfriends gifts, Host gift, Rough Week, Get well, etc, etc!
Loads of ‘life happens’ reasons to give this kind of gift!

Enter Chocolate & Post-it notes: I wanted the box to be a square so I grabbed 4 chocolates and my eyes took a stroll around the desk while pondering what do I have already in a square that will inspire size so I don’t waste time or paper attempting to get this just right?
I grab a post it 3 x 3 size to see if 4 Ferrero Rocher chocolates will fit inside that size/shape. These chocolates to my eyes are size deceiving… Yes! They fit! Next, I measured the height of the chocolate.
These are around 1 1/4″ tall.
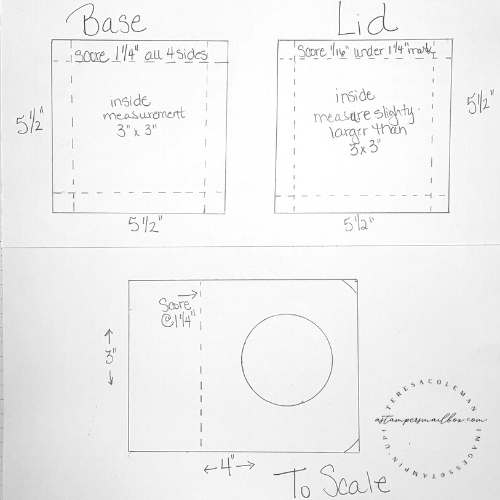
Cardstock for a Square Box
Here is my math for the size: 1.25 + 3 + 1.25 = 5 1/2″ x 5 1/2″ (x2)
Note: Top 2 sketches are not to scale: Note Box Base & Lid are the same size- it’s the slight change in scoring that makes this a snug lid to box fit!
When you score the lid- slide your cardstock just 1/16″ back. This seems counter intuitive when you are scoring but when you make this slight scoring change on all four sides of what will be the lid piece(s) The inner dimension of the scored area becomes bigger.
Your box lid will slide right over the base nice & snug.
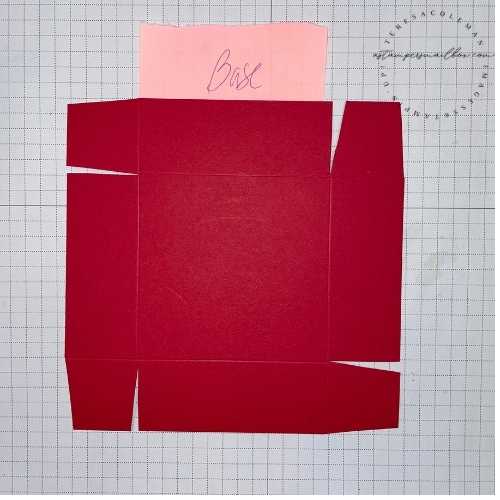
Prep your pieces & layers first!
Base x 1 pc., Lid x 2 CS/DSP.
Bottom sketch shown in above photo is the wine tag ‘flap’ drawn to scale.
( 3’x4′ score at 1 1/4″ , round the corners)
This really is a very simple box base construction with an additional flap that has a circle die cut out for hanging over the neck of a wine bottle. To give this box/hanger tag more strength, I doubled up, using both Cardstock & DSP.
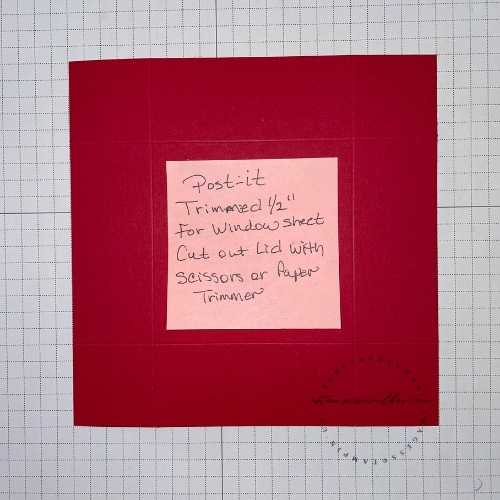
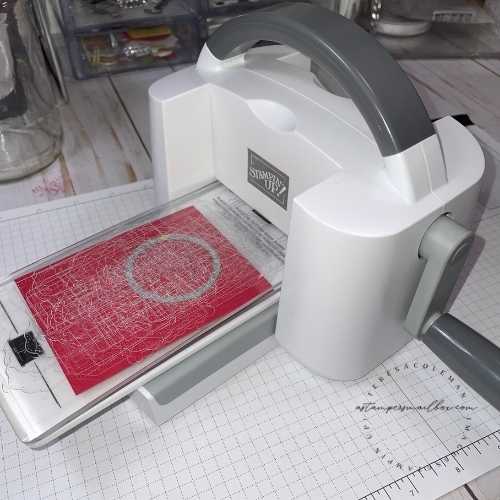
Box Lid: To give this box/hanger tag more strength, I doubled up, using both Cardstock & DSP. Score the lid pieces separately following the above tip description then stack the layers. Using the Paper Trimmer to cut out the inner square of both layers at the same time – photos show process- you could cut down a post it by 1/2″ on all two sides to make a trace template. Place this trimmed down Post-It note in center of scored area. Paper trimmer has guide marks (see terrible photo below) to follow around or trace & use paper snips to cut the center out of the box lid.


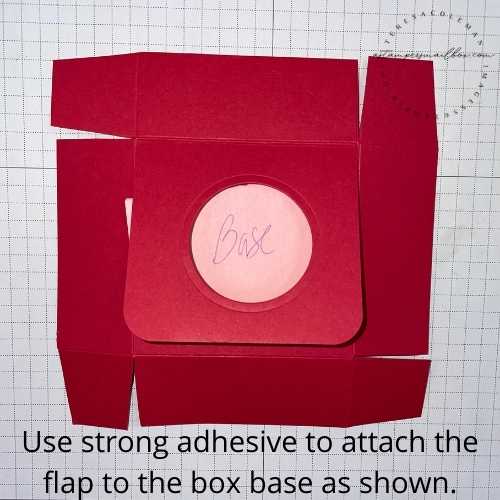
Attach the Hanger Flap to base first:

Note: for the finished project- I decided to go ahead and place a layer of DSP over the hanger flap. I recommend doing this from the start: gluing the DSP to the hanger top portion – leaving the section below the scored line single layer plain. Reason: So that there isn’t too much bulk for your lid to slide over. You can easily die cut the circle through both layers at once. I did this as an afterthought. (lesson learned) As you can see in this photo- I expected the red to look good alone on the hanger- nope, crafters prerogative- change ones mind!
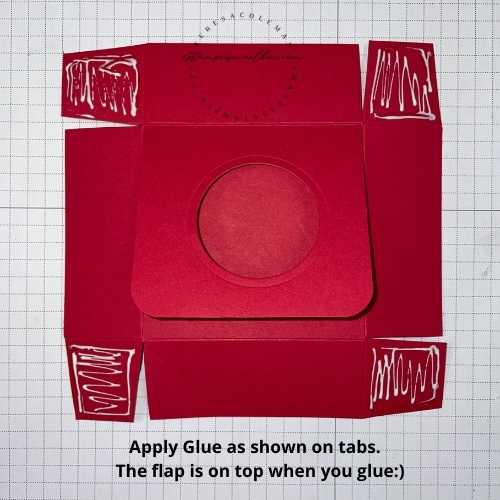
Liquid Glue for the remaining tabs to assemble box base:
Take a window sheet or other recycled pc of sturdy plastic slightly smaller than 3″ x 3″ use glue tabs/dots to adhere onto box cardstock lid. I like a dry adhesive for this purpose so that the liquid glue doesn’t ‘squish’ out onto the plastic. Now take the DSP lid and glue in place over the cardstock lid.
Tip: Dry fit these pieces first so that you can be sure that your square cut out of the DSP & Cardstock lid match up perfectly. ( yes, I do know this by trial & error:) This box looks a bit wonky because it’s a prototype base and got alot of wear open/close- yours will look perfect!

To finish it out: I used Peaceful Deer set and made this to be given as a group gift with a slide in card at the back of the box. This would be great to give as an office gift for a retiree or when several family members want to chip in on a really really nice bottle of wine and want to pair it with nice chocolates too. Any stamp set & sentiment set fits the wine & chocolate occasion! Fancy it up or keep it casual! The photo’s don’t pick up the detail but I used some fine gold twine leftover from a Paper Pumpkin kit to give the reindeer gold scarves. On the front of box I used the same gold twine strung between the two reindeer to add more gold color to tie in the gold of the wine bottle as well as the Ferrero Rocher chocolates.


Finished Measurements:
- Box: 3″ x 3″
- DSP & Cardstock: 5 1/2″ x 5 1/2″ – you need 2 ea. ( If your DSP is a thicker paper- you don’t need Cardstock)
- Score: Box Base: 1 1/4″ on all four sides
- Score: Box Lid: this scored areaneeds to be slightly larger than the base to slide on/off easily- what I do- is place the edge of the cardstock on the 1 1/4″ line then slide the cardstock back by 1/16″ of an inch. By doing this you are increasing the inner dimension of the box lid, the section you will be cutting a smaller square of for the see through lid window.
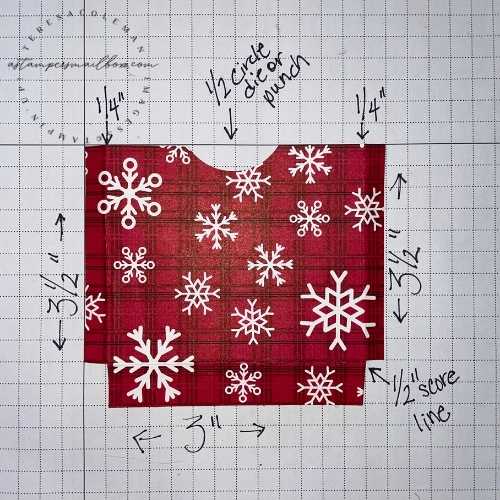
- Hanging Flap Section: I used a cast off cut from cutting the base / lid pieces. 3″ x 4
- ‘ Cut a circle out the size of your wine bottle cork/neck section. I took my Layering Circle Dies and test fit which die would easily slide over the wine bottle to decide what size I needed.
- Score: slightly under 1 1/4″ on long side – this scored section is glued under one side of the box lid.
- Card Sleeve~back of box: 3″ x 3 1/2″
- Score: bottom at 1/2″ , 2 sides at 1/4″ and 1/2 circle punch or die cut for finger notch.
- Mini Gift Card: 2 7/8″ x 5 5/8″ fold in half.
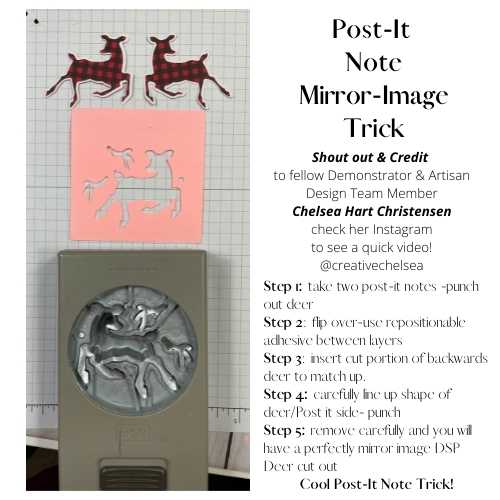
- See image below for Mirror Image trick on this DSP Reindeer! You’ll get 2 deer quick punched! No Fussy cutting!
Products used in this Project:


Price: $0.00


Thanks for joining me today for Find Your Inspiration Friday!
Have a Great Weekend,
Teresa
Send a photo in of your Find Your Friday Inspiration!
I would love to see how you take this idea and make it your own!


Oooh! Wine and chocolate! That seems like the way to become someone’s new best friend ASAP!