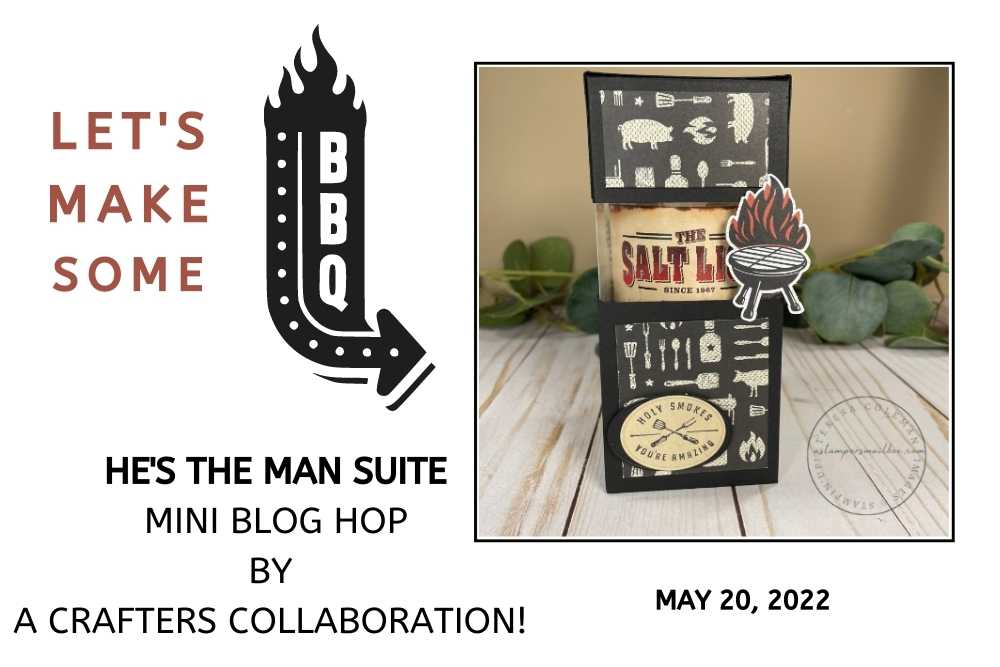
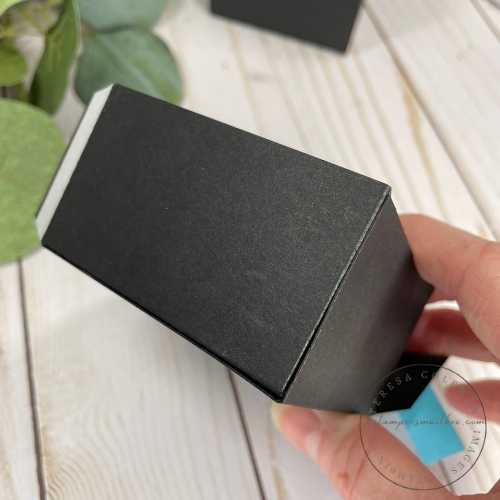
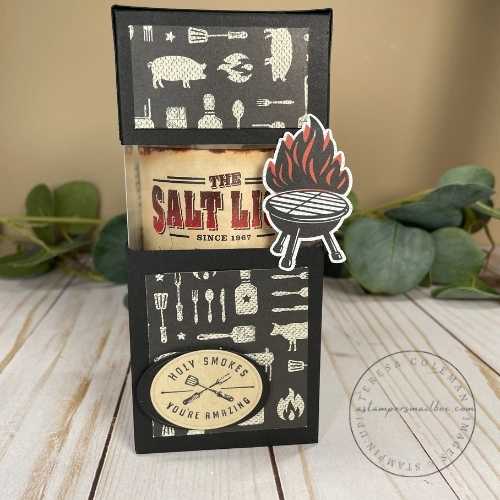
BBQ Gift Box with Peek Panel
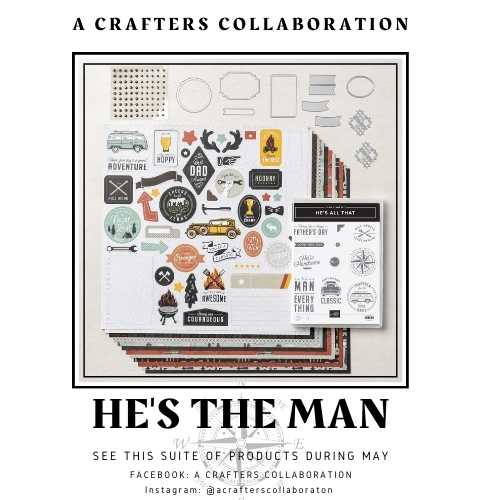
He’s the Man Suite gets a crafty jump on our first A Crafters Collaboration Mini Blog Hop! Donna and I were very excited to bring our subscribers a collaborated tutorial this month so while we were chatting that up we decided to carry on the fun of this months highlighted suite of products and put together A Crafters Collaborated blog hop!
Every week over at our Facebook Page and Instagram feed you will see a different project with this bundle and it’s coordinating products.
This blog hop brings you a couple more ideas by Donna & I to inspire stamping fun and creativity!
_________________________________
My creative jump start came from Sunday meal prep a couple of weekends ago. We smoked a chicken and a pork shoulder using some of this BBQ rub. We love Texas Barbecue and this restaurant is a prize!
If you are ever in southern Texas, look them up and swing by there – It’s Excellent!!
Salt Lick Barbecue – you won’t be disappointed!
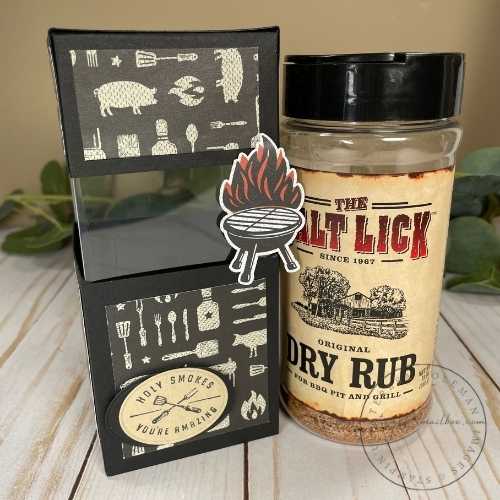
Meal prep spice ready and this fun Designer Series Paper, along with the fun stamps in the set – it’s a win for a guy’s gift! Pair this with your favorite BBQ accessories or a picnic basket full of other theme stamped items and you’ve got the perfect gift!
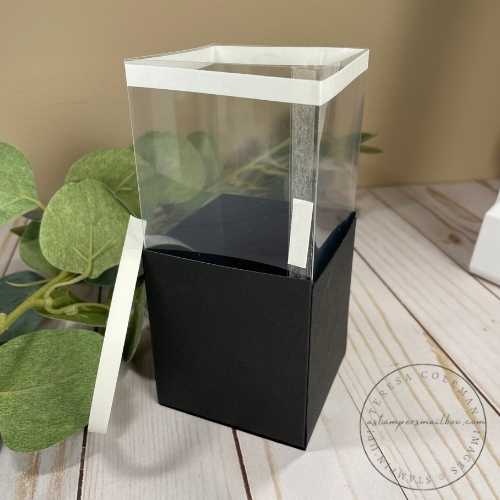
This box design has a peek through window to see what’s inside. I have another started with Basic White Cardstock, waiting for just the right gift to inspire one for the gals!
Before I share how to make this box- here’s a link to hop over to Donna’s Blog post to see what she has to share made with He’s the Man Suite!

Lets jump in to how to make this fun box!
Grab some supplies: Cardstock, Window sheet, your favorite patterned paper of the day, glue, Tear & Tape or other 1/4″ wide adhesive, stamps & ink along with a paper trimmer and bone folder – you are set.
Measurements:
Click here for templates PDF: Box Lid, Window Panel & Base
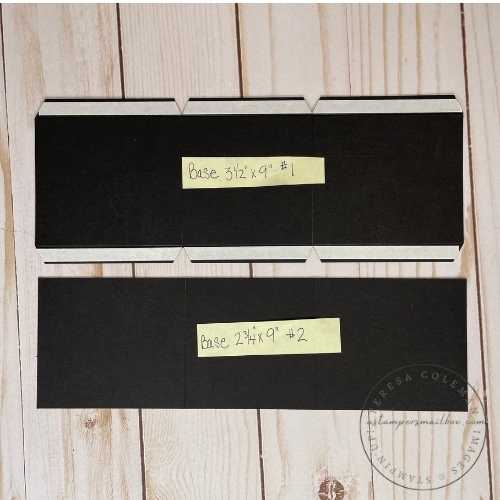
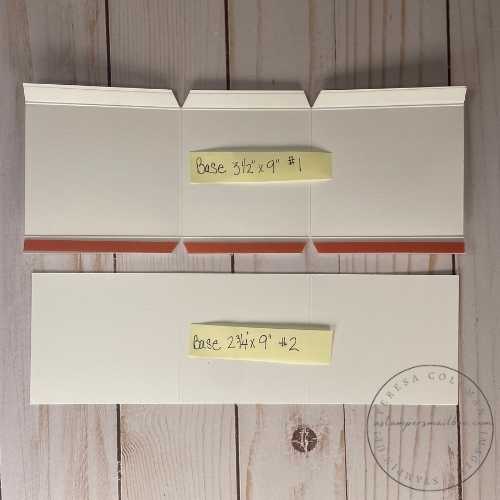
Base: Cardstock #1) 3 1/2″ x 9″ Cardstock #2) 2 3/4″ x 9″
Cardstock #1 score vertically @ 3/8″ on each side then score horizontally @ 3 1/8″ on each end (abbreviation: CS # 1)
Cardstock #2 score horizontally @ 3 1/8″ on each end (abbreviation: CS # 2)
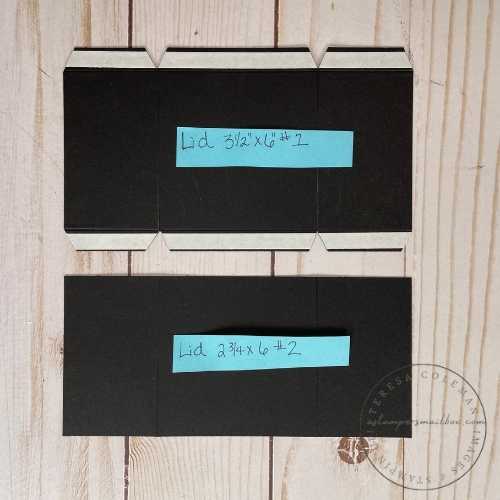
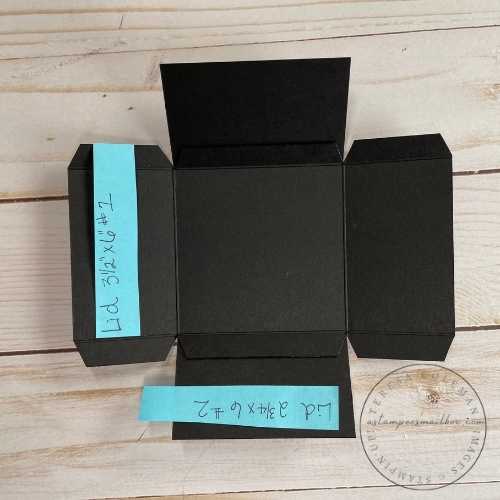
Tip: I label my pieces as I go – you will see in the process photos – it’s a guide for me as well as for you! This isn’t a hard box but it’s a new style for me so maybe it is for you too- labeling keeps us straight:)
-
Fold & burnish all score lines
-
CS # 1: Tear & Tape on 3/8″ score lines all the way down length
-
Wedge cut each end and ‘V’ cut on score lines (see template)
-
Lay CS #1 across CS #2 ( like a plus sign) [CS#2 on the bottom]
-
-
Dry/test fit layers
-
Liquid glue CS #2 mid section / adhere CS#1 back in place making sure sides fold properly- burnish to adhere well
-
Remove backers from side mid- tabs- fold one side over at a time to adhere snugly- see photo below
-
Side tabs: remover backers one at a time adhere edges to fold lines
Let me show you what I mean with the above directions:

Now that all your pieces are precut and scored.
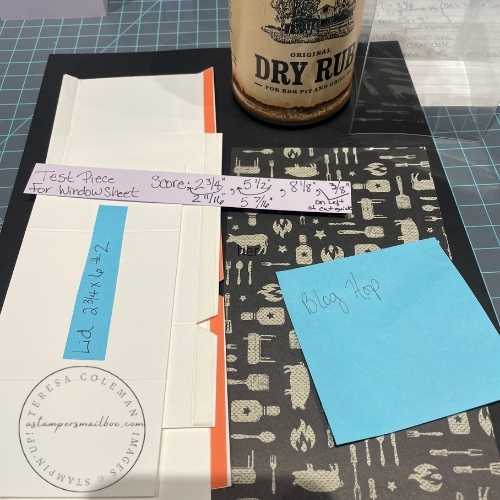
I have Basic Black cardstock for the Dry Rub box and Basic White done for a future box ready to go!
In the photo: the Base piece label #1 has the 3/8″ score line with tape already applied and the notches cut out. As well, I wedge cut the ends.
The black paper on the wood grain photo surface is a bit hard to see- you may need to zoom in- here is another photo of the white cardstock to help you visualize – I used Red Line tape as a visual too – Tear & Tape work just fine for this project.- no need for more expensive adhesive.
I hope this is a bit easier to see when you zoom in.
Always use a bone folder to burnish the score lines before assembly.
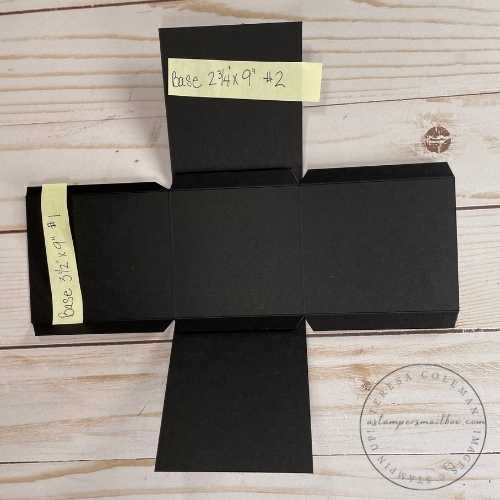
Now it’s time to assemble the box base: Test fit to see how the pieces go together.
Note that CS # 1 base piece has been flipped over so that the adhesive is facing down.
CS #2 Apply glue to middle section only.
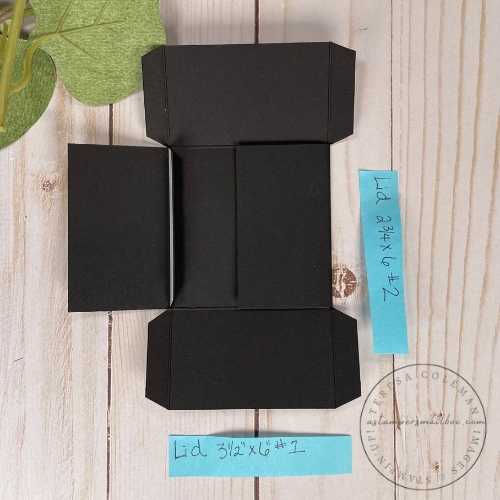
Remove backers from side mid- tabs- fold one side over at a time to adhere snugly. The above folder shows the right side of the box base- I’ve removed the tape backer and pushed the side flap of CS 2 down over the tape. Repeat on opposite side.
Now, one at a time- peel the backers off the tabs – bringing them up to meet the corners. The next photo is of the lid but it’s the same assembly procedure for both base and lid.
Test fit if you are unsure before removing adhesive backers.
Now it’s time for the lid
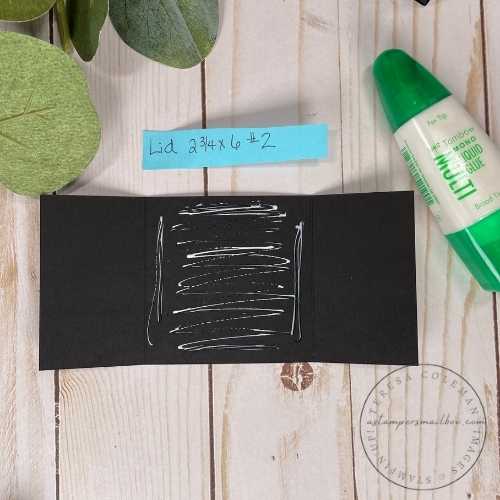
Lid: Cardstock #1) 3 1/2″ x 6″ Cardstock #2). 2 3/4″ x 6″
-
Cardstock #1 score vertically @ 3/8″ on each side, rotate then score horizontally @ 1 5/8″ on each end
-
Cardstock #2 score horizontally @ 1 5/8″ on each end
Follow the same assembly instructions as the box base.
Placing Lid CS #1 over CS #2 with the #1 piece tape side down.
Refer to the above photo for lid side tab to corner matching for the finish assembly of lid.
Last component for basic box shape is the Window Sheet peek panel section. I thought it would be fun to have a window into what’s inside this gift. Let’s show off that restaurant name! I designed this to not only be a ‘peek’ but to also act as some structure for the box. The gift isn’t really heavy but using stiff plastic in this way it makes the single layer cardstock box base more sturdy.
(beware, my photography skills don’t lend to taking photos of shiny plastic without lighting glare:)
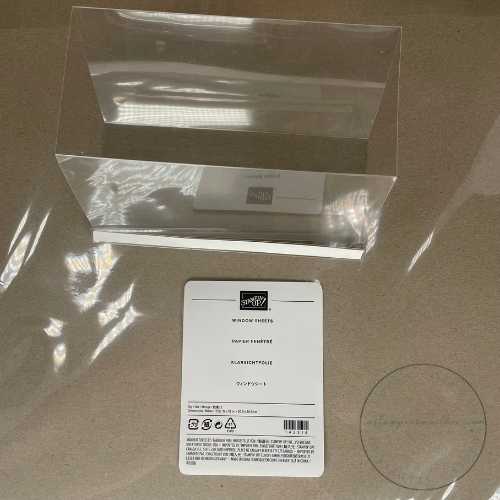
Window Sheet: ‘Peek Panel’ Cut 5 7/8″ x 11 1/4″
-
Score horizontally at (one mark under) 2 3/4″ (= 2 11/16) , (one mark under) 5 1/2″ (= 5 7/16″) * 8 1/8″ then slide window sheet to so that the end is on the left of cutting guide at 3/8″ .
-
This last score line becomes the tape section. Ok: this is kinda hard to read & follow right? Here’s a guide for you on this scoring:)
-
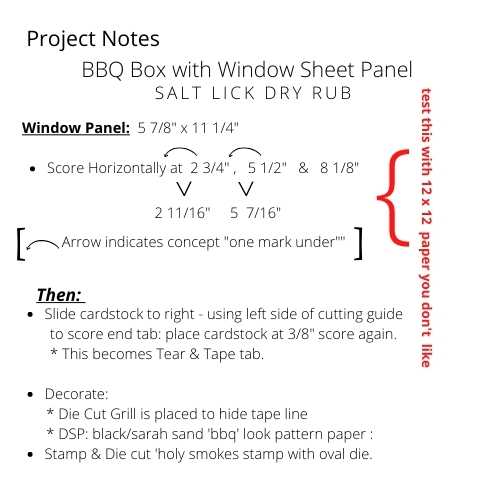
In red print in the photo above – I encourage you to make this with 12 x 12 cardstock or patterned paper you don’t like- because, making a mistake in scoring on less expensive paper is easier to practice on than the more expensive Window Sheets. These are so great- very thick and perfectly clear plastic.
Expensive at 2 sheets per package but worth it!
Tip: Stampin’Up! Window Sheet as I said, is quite thick and requires very good scoring to be able to manipulate it into a box shape. Run your scoring blade over the lines back & forth several times. Always use a bone folder to get sharp lines, folds and creases!
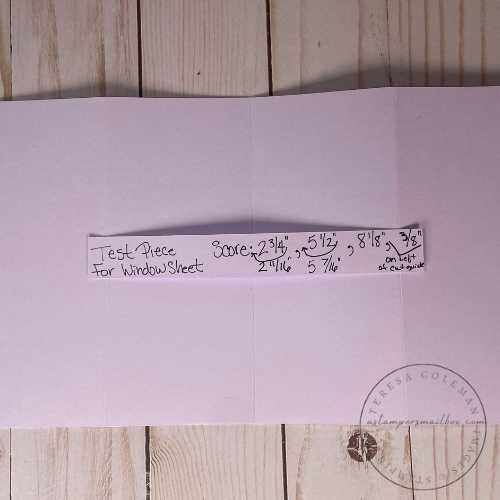
This purple sheet is my test piece for the window sheet peek panel and my label ‘notes’ I always make notes while I’m crafting so that I can see where my mistakes are!
Ok.. enough with the jibber jabber- on to the finished look of the window panel. Apply Tear & Tape adhesive on the narrow end score – this becomes your adhesive tab.
Always dry fit before taping.
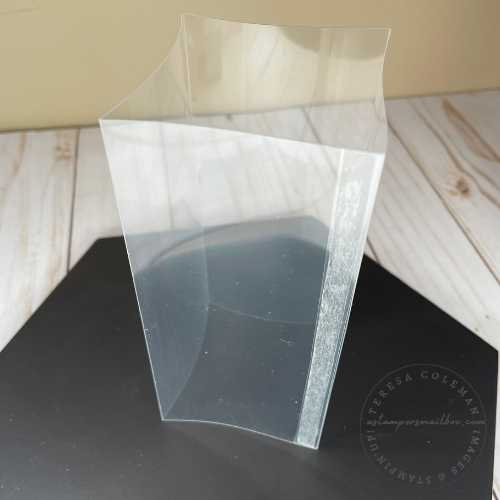
Essentially, I’ve created an open column the correct dimensions to snug into the lid & base.
That’s alot of instruction for something that looks so simple. Well, it is and it isn’t – it’s rather a trickle down effect.
Process: Measure your gift: in my case it’s the BBQ Dry Rub spice bottle – those gift dimensions become your box measurement guide. Therefore all the corresponding pieces must fit together just right:) That’s why the window sheet scoring for this box is so tedious. Don’t let that scare you off- this box is worth it!
Time to put the 3 pieces together! I chose for the window sheet to attach to the lid and slide down into the base. I liked it this way and thought it a bit unique so here’s how I did it.
Dry fit the window sheet into the box base. Apply Tear & Tape to top section. I applied a short piece for the BBQ grill die cut to apply later. Dry Fit! If you haven’t heard me say it enough- will say it again here in the same paragraph – before removing any backers it’s important to have a feel for how your box is going to go together. This is a good opportunity to read ahead a few steps to ensure you have that ‘feel’ for what’s going to happen next. You will note that during the dry fit the window panel wants to bow inward a bit- that will be fixed when you finish the taping.
Pull back about 2″ of the backer and place lid gently over the top. I started at the opposite side of exposed adhesive as shown in photo below…
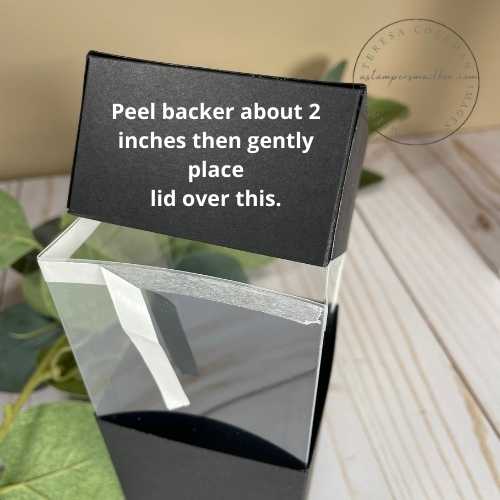
By leaving a bit of backer exposed below the edge of the lid piece you can use it as a slow pull removal tab for attaching the lid to the window peek panel.

Now, remove lid/window sheet section from base piece to allow you to lay the lid and window sheet on their side- you will need to be able to get the bone folder inside to help you adhere the plastic to the cardstock.
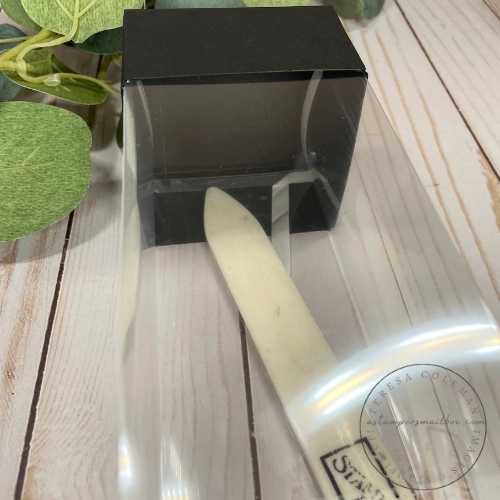
Using that backer ‘pull tab’ as stated above- slowly work your way around the box- every few inches use the bone folder inside the lid as shown in the photo above to push the window sheet down onto the tape and cardstock lid. Your window panel should be laying nice and ‘square’ now.
You only want to do this step to the lid. That’s how the gift is opened – by pulling the whole lid/peek panel out.
Time to BBQ it up!
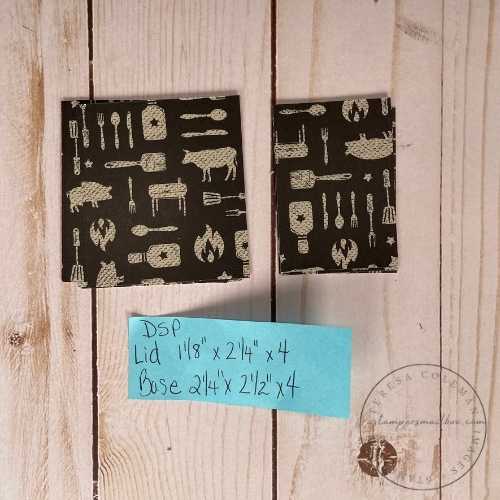
Apply the larger pieces to the box base and the smaller to the lid. Grab a laser cut image from the sheets included in the Designer Series Paper: He’s All That. I chose the BBQ Grill – of course:).
Note: I removed the Tear & Tape I applied earlier and added dimensional foam in it’s place. I wanted the legs of the grill piece to extend over the base when I take the lid off . This extra ‘lift’ away from the plastic allows free movement of the lid and window peek panel without damage to the grill image. Also, by placing the adhesive dimensional foam here it hides the Tear & Tape on the window panel. 🙂 Bonus!
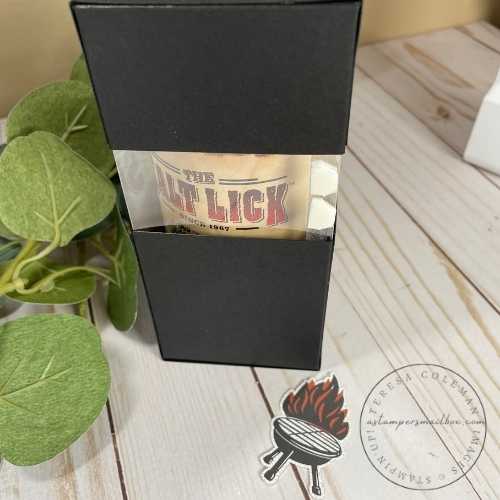
A bit of gluing now and we are all done- ready for a fun gift! I think you could easily slide a restaurant gift card or a grilling supply store gift card inside this and a BBQ lover in your life will be thrilled!
What a way to kick off summer!
Thank you for joining us on the Mini-Blog Hop journey! Make sure to hop over to Donna’s blog if you didn’t earlier!
Donna at: www.wingedhorsedesigns.com
To view the complete supply list for this project – click the red banner!


Happy Paper Crafting and make sure you check in with us over at…
