Hello and Happy Friday!
I thought I would share the card tutorial that was sent out to my subscribers. I don’t share these cards and tips every month here on the blog since they are for my newsletter group. These are fun cards and they share a common theme!
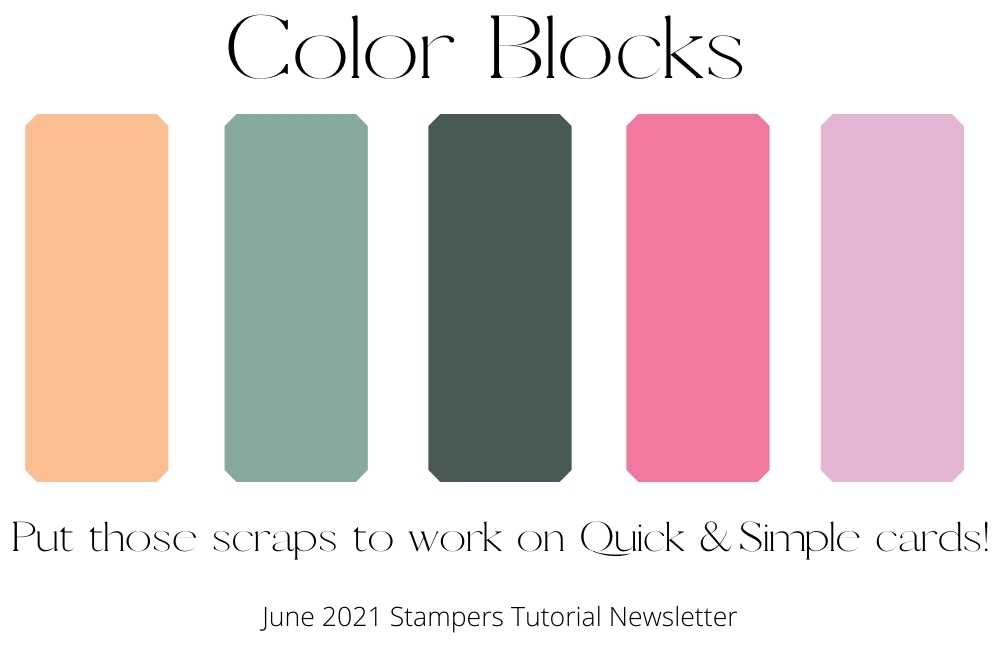
Color Blocks!
I love our cardstocks and I love even more- Basic White Thick Cardstock for bases! I have an affinity for a crisp white card base… dunno why but I do!
Here are 4 Quick & Easy cards that I’ve used Stamps, Ink & Paper, a couple of punches, my trusty scissors and paper trimmer to make these.
What a great way to use up small pieces/scraps of colored cardstocks!
All Supplies and an easy ‘add to cart’ link will be at the end of this post!
Card 1
Features sentiments from Lighthearted Lines

I grabbed a good size scrap of Daffodil Delight cardstock, cut some squares using the left edge of paper trimmer as my guide for size. Simple: slide the cardstock in from the right to the left- when it ‘bumps’ against the guide- that is where you cut! Cut 4 squares using that edge ‘bump’ as your guide with any color you want- then take a scrap of Basic White (regular or thick) cut 4 squares at 1 1/4″. Now, round one corner of each square with the Detailed Trio Punch. Stamp fun sentiments!

Tip: Those smaller scraps of cardstock are hard to line up in the Detailed Trio Punch – grab a sticky note- attach it to your scrap- then place in the punch!
Finished Card Measurements: 3 5/8″ x 7″
Basic White Thick Cardstock Base Card: 7″ x 7″
Daffodil Delight: 4 Squares 1 1/2″ x 1 1/2″
Basic White: 4 squares 1 1/4″ x 1 1/4″
Ink: Daffodil Delight
Stamp Set: Lighthearted Lines
Card 2
Also features sentiments from Lighthearted Lines. This Set is alot of fun! 13 year olds are ready to put those ‘kiddo’ cute cards away (kinda, I think) This card has a grown up vibe with a touch of whimsy in all the fun color blocks I used!
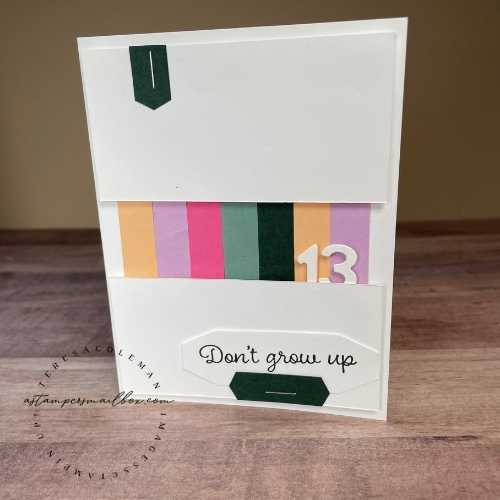
By using the whole range of new In Color Cardstock colors and stamping in the Evening Evergreen ink along with a few touches of that dark Evergreen for accents – a stapler, some dimensionals , glue and this card comes together quick! Using glue to adhere the In Color scraps and dimensionals to add lift on the white layers. This style of card can become any style- add flowers & flourishes, use masculine colors and stamping, baby colors and images -etc, etc!

Notice what I did on the front – I took a scrap of white narrower than the punch- on the actual card piece, I used a post-it note to mask off the (It’s A Trap) portion of the sentiment. I wanted “Don’t Grow Up” to be on the front and ( IT’S A TRAP) on the inside of the card. Ok- turn the punch over- insert the cardstock into the punch into the opening as shown in the photo. Punching to get the perfect shape on the ends .
Tip: I also like Post-it tape for masking on stamps! I added “Happy Birthday” on the back of the card.
Finished Card Measurements: 4 1/4″ x 5 1/5″
Basic White Thick Base Card: 4 1/4″ x 8 1/2″
Basic White Front Layers: 2″ x 4″ (2)
In Color Scraps cut down to 1/2″ x 2″
Playful Alphabets: what ever age numbers you need- I used regular Basic White you can use whatever color you want.
Scraps: Evening Evergreen to punch with Tailored Tag punch too!
Tip 2: Using a stapler to add small layers is a fun & easy way to add a metal accent.
Card 3
This card features images from the Biggest Wish stamp set.
Keeping the colors and style simple for a young boy!
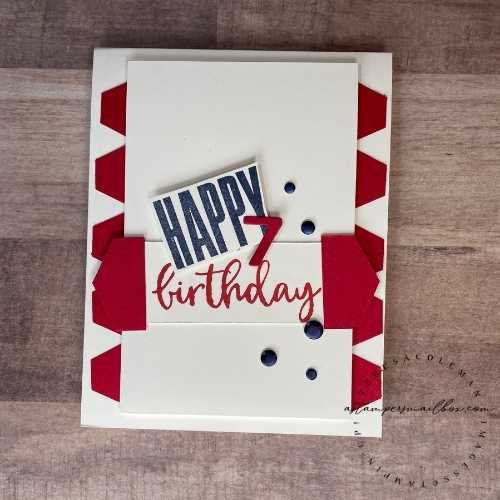
I punched 5 red Tailored Tag punched pieces – cut them so that I have just the end pc’s tucked under this top white panel that has been lifted with foam strips. I used Night of Navy for the Happy and Real Red for Birthday as well as the cardstock pieces.
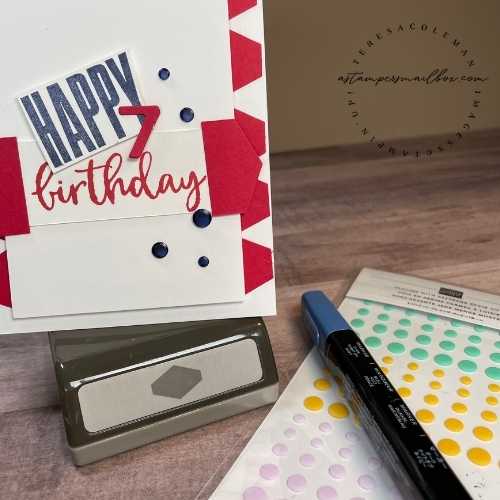
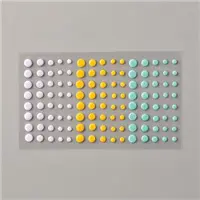
Tip: The Playing with Patterns Resin Dots are nearly flat- which on single layer cards is super so that you don’t need additional postage for ‘non-machinable’ cards. I used them here because I didn’t have any Night of Navy embellishments and this card needed a bit of something – I colored these dots with a dark Stampin’Blend Alcohol Marker right on the sheet they come on then pop off once dry to adhere to card. It works great- color one layer of your preferred color- let dry well- then 2nd coat- dab on more color- it will look funny at first but trust me – once these are dry- they look just like the photo! What a great way to take a color of dot you don’t want and coordinate it with a marker to just what you need. Any alcohol marker will work – Sharpie, Copic, etc.
Finished Card Measurements: 4 1/4″ x 5 1/2″
Basic White Thick Base Cardstock: 4 1/4″ x 11 Score at 5 1/2″
Basic White Regular or Thick : 3 1/4″ x 5″
Basic White Scraps: for ‘Happy’ image, for Birthday scrap 1 1/8″ x 3″
Real Red Scraps- punch 5 Tailored Tag shapes plus a scrap to insert back into punch for the banner shape you see on card & a number die cut.
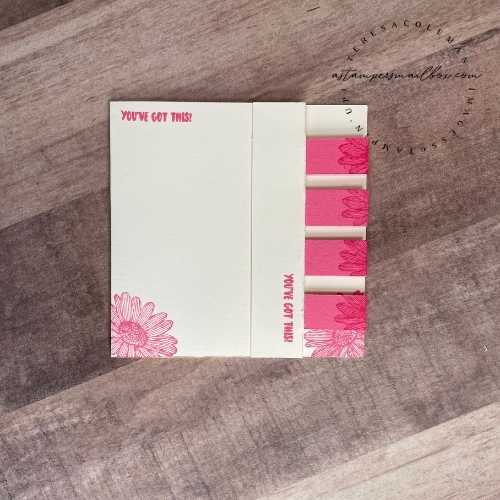
Card 4
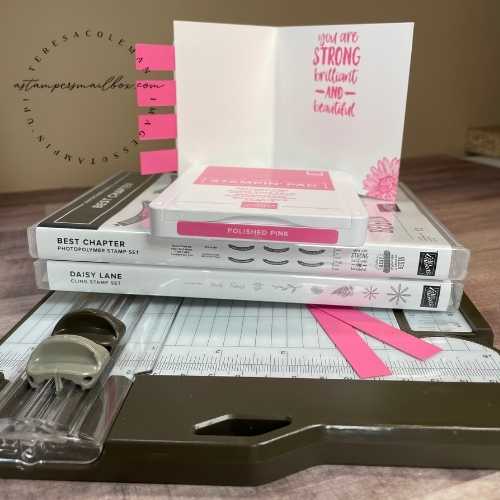
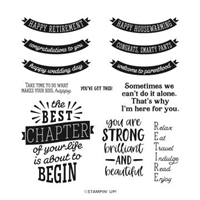
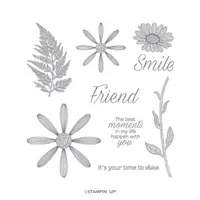
This adorable floral pink mini card features an old favorite – Daisy Lane paired with a new set called Best Chapter. This set can create sentiment banners for lots of occasions, it touches on Retirement, new beginnings and encouragement! I’m using this as a cheer up card for a friend! The style of card plus the beautiful new pink color along with the sentiment that reminds our best pals that they are beautiful and strong!
Creating this card was alot of fun!
I think I will make a matching gift bag or Chick-Fil-A drink carrier makeover to deliver a fun gift to a pal.
Tip: By using strips and tucking them into a folded back / slit section of card you can create a floating tab like effect on a card front with minimal effort.
How I did it: I scored the card front at 3/4″ then cut a slit in that fold with my trimmer apx. 3/8″ from each end. I then folded that section back on itself- exposing the cut in cardstock. I took 4 scraps of Positively Pink cut the same size and stamped with Positively Pink Ink using the smallest flower in the Daisy Lane set. Using a strip of Tear n Tape the length of the fold placed on the card front- slide the strips of cardstock in and secure them down on the tape- add another piece of tape over the top to secure the white flap down over the strips. Note: prestamping the sentiments before adding the strips is easier:)
Finished Card Measurements 3 1/2″ x 3 1/2″
Basic White Thick Cardstock: 3 1/2″ x 7″
Positively Pink Strips: 1/2″ x 1 1/2″
Tip: Use the Stamparatus to create a stack of these super quick and easy!
I hope you’ve enjoyed these fun and really simple yet ‘scrap-tastic’ use of those bits of cardstock you may have leftover from previous projects!


Crafty Mail really is the Best Kind
Beats Junk mail any day
