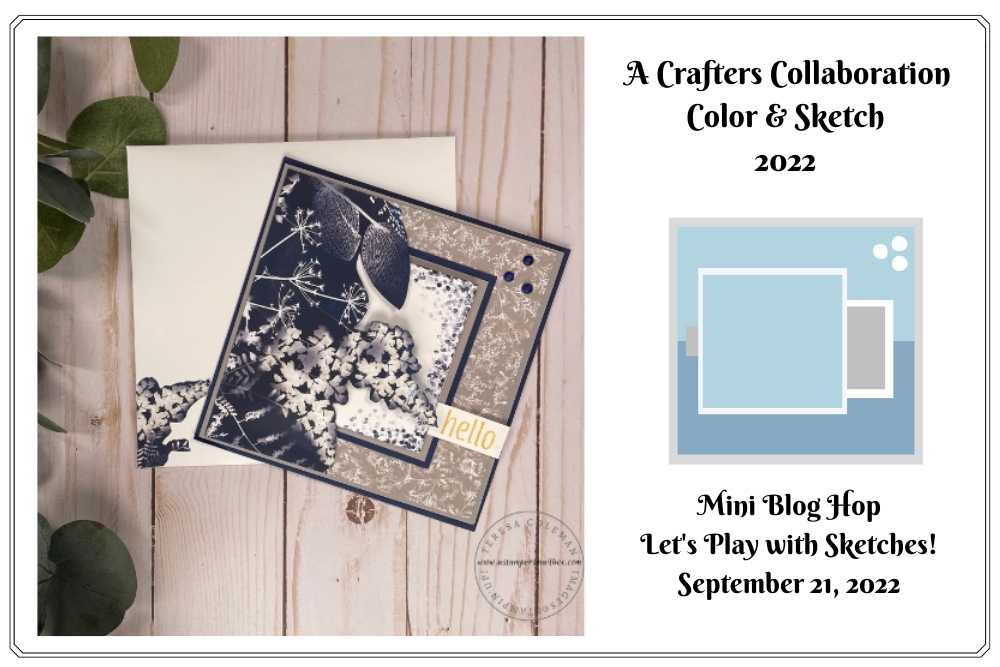
A Crafters Collaboration Mini Blog Hop 2
Welcome to the September edition of A Crafters Collaboration Mini Blog Hop and Sketch Challenge. Every month on our collaborated social media pages we share a new theme, topic, technique, stamp products and more! We have been having fun with the color challenge and a collaborated exclusive subscriber tutorial! Did you miss it? No worries, you can sign up for our newsletters and get monthly access to our free tutorials. This will have you ready for the next combo tutorial.
Alright, on to today’s project!
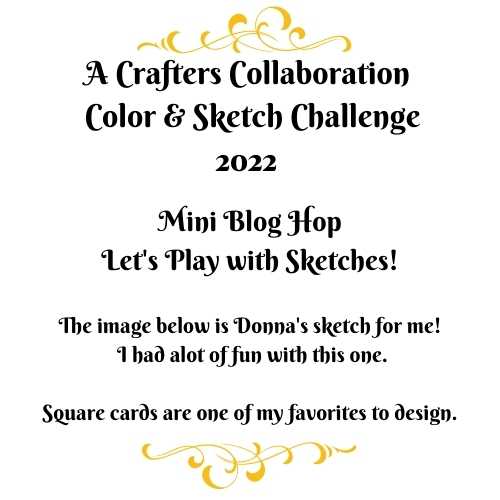
Scroll to bottom to see Donna’s blog post!
I assigned her a curvy gate fold sketch.

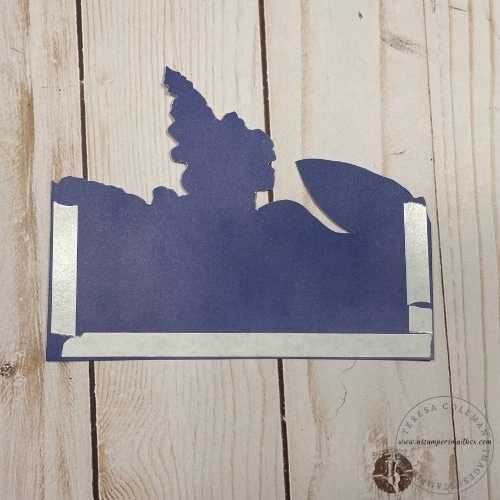
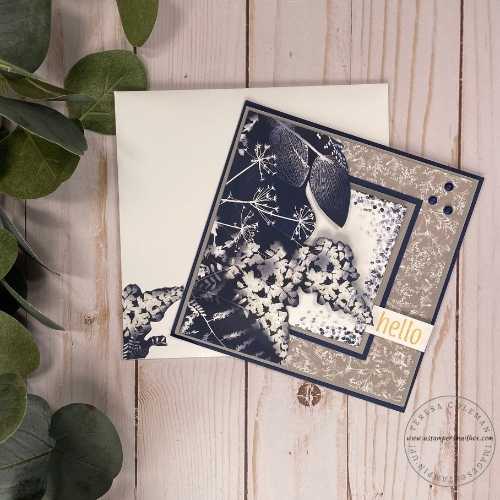
I decided to take this sketch, rotate the back layers and make the card a left fold opening card with a pocket element.
The grey tab on the left was moved to the right as a pull tab for the pocket card.
Let’s talk supplies:

I chose 3 of the 6 color challenge palette colors!
Crushed Curry, Gray Granite & Night of Navy
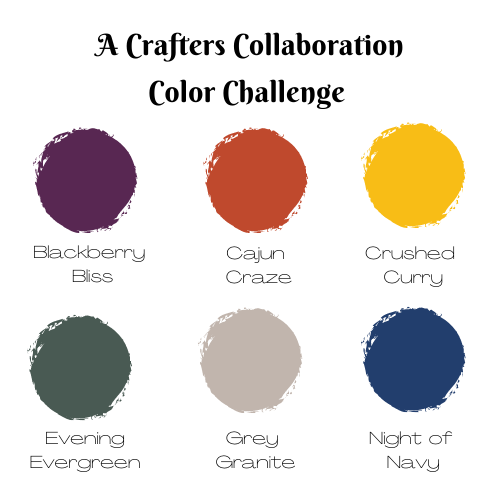
This is a beautiful fall inspired color combination.
This card sketch is a fun one and I think this card can easily be a birthday card for a guy or gal.
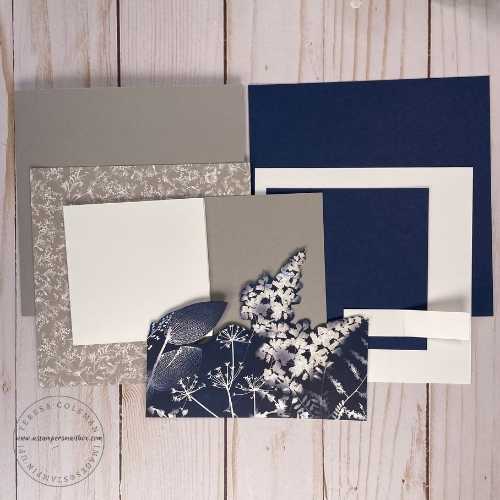
Cardstock Dimensions
Card Starting from back mat:
-
Night of Navy: 5 1/2″ x 5 1/2″
-
Gray Granite: 5 1/4″ x 10 5/8″ Score at 5 5/16″
-
Designer Series Paper: Sun Prints
-
Grey Pattern: 5 1/8″ x 5 1/8″
-
Night of Navy/Starry Sky Color: 5 1/8″ cut to desired shape
-
Inner Basic White layer: 5″ x 5″
Pocket Insert:
Starting at back mat:
-
Night of Navy: 3 3/4″ x 3/4″
-
Gray Granite: 3 1/2″ x 3 1/2″
-
Basic White: 3 1/4 x 6 1/2″ Score at 3 1/4″
-
Tab: Basic White 3/4″ x 3″ Score at 1 1/2″ fold in half.
Pre-Cut the cardstock and Designer Series Paper

Gather some extra supplies
-
Glue dots (in case your embellishments don’t want to stick well like mine:)
-
Custom Color those dots: Stampin’Blend Marker to coordinate
-
Velcro Dots – I wanted my pocket card to stay snugly closed. This is completely optional!
-
Adhesive(s) of choice- I like Tear N Tape and Multipurpose Liquid Glue

I started the assembly process at the back of the card.
The Gray Granite right opening card (left side fold) attached to the Night of Navy back mat.
I love how Gray Granite and Night of Navy look together.
At this point- you could simply add a big sentiment, some embellishments and call a card done -this Designer Series Paper is so lovely!
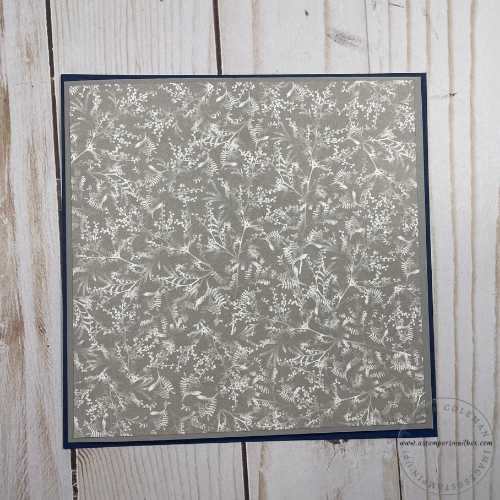
Time for a pocket. I chose the Night of Navy/Starry Sky sheet from the Sun Prints Pack of DSP and fussy cut around the white images.
To make this into a pocket- I simply put Tear & Tape on 3 sides leaving the fussy cut section adhesive free.
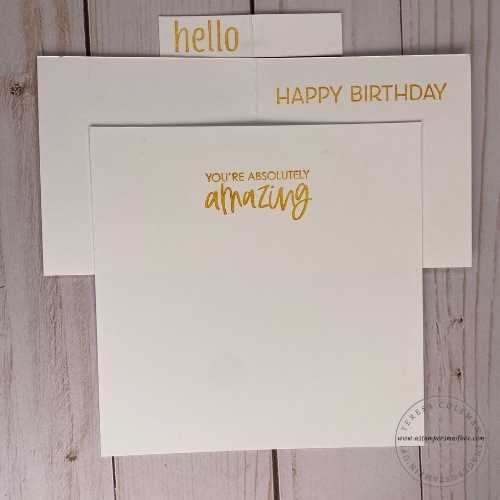
I used two stamp sets to gather sentiments for the card.
The fonts aren’t an exact match but I like them well enough together.
Stamped with Crushed Curry ink to bring in a 3rd color from the Color Challenge Palette.
It gives a fun pop of unexpected, bright color to this card.
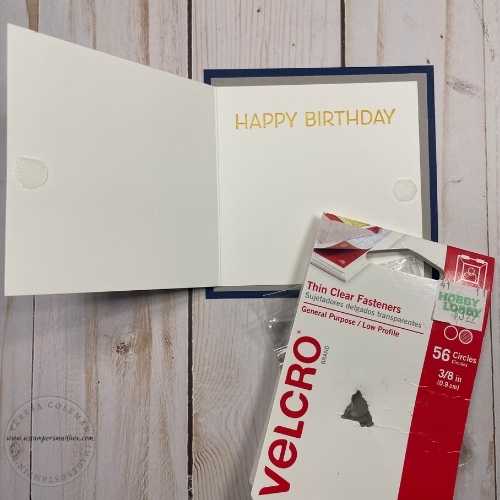
I wanted the pocket card to stay closed – I chose to use small Velcro self adhesive circles for this.
They work great, are flat and great to hold lightweight layers together.
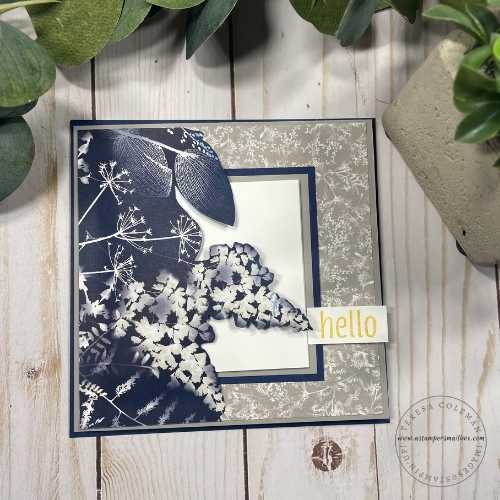
Attach the tab to the pocket card so that it becomes a fun pull tab element.

It needs a few finishing touches.
I simply stamped the small dots stamp from the set ‘Artistically Inked’ along the right edge and corners to fill in the white space.
You could stamp the entire perimeter of the white card if you like!
Then using the Dark Night of Navy Stampin’ Blend Marker I darkened one of the blue Matte Decorative Dots.
The original blue of the Dots is lovely but I needed a deeper shade. This is a super easy way to custom color embellishments to coordinate with your projects. Simply ‘paint’ the color on the adhesive dots, allow it to dry for a bit and place on your card.
Easy, Peasy!
_________________________
Time to make an envelope for your card!

Large cards need DIY Custom size envelopes. This card has a finished card measurement of 5 1/2″ x 5 1/2″ therefore the envelope needs to be close to 6 x 6. Would you like to see more envelope templates? Click on the image above to view a blog post with lots of envelope templates!
Don’t want to make your own?
Here is an Amazon link for you!
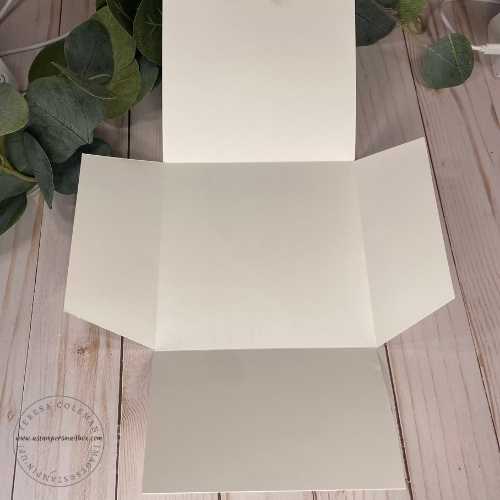
Quick Measurements:
Finished Envelope Apx 6″ x 6″
-
Premium Paper 11″ x 17″
-
Cut down to 11″ x 15″
-
Score:
-
Top Flap: 4″
-
Bottom Flap 5″
-
Side Flaps 2 1/2″
-
Tip: Fold flaps up to middle to score in paper trimmer. This means you will be scoring on a double thickness, I flipped the envelope paper over to score on both sides to get a nice sharp crease.
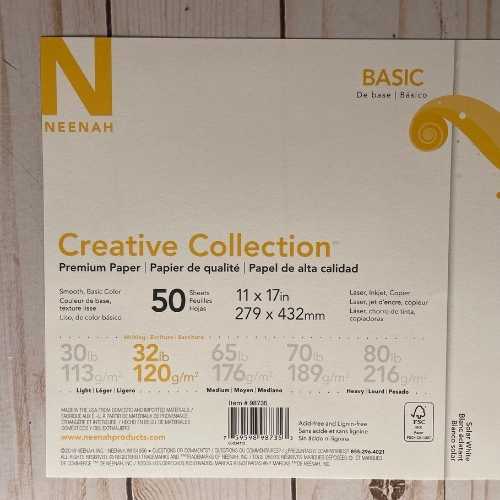
This is the paper I used for today’s envelope.
I purchased this at Office Depot.
Click on the paper image above to hop over to Office Depot.
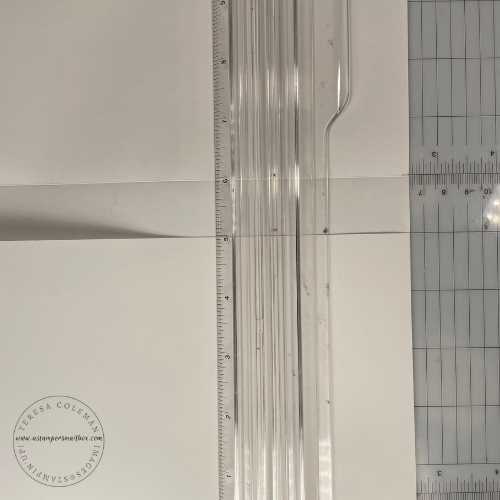
Here is a none so great photo of me trimming/scoring the envelope. I went ahead and included this image so that you can see I have the paper folded onto itself while scoring. 15″ length is just too long for the trimmer but the scoring blade is plenty up to the task!
Let’s talk adhesive for a moment – for envelopes I prefer a dry adhesive. Either a double sided on a roll like Tear n Tape or 3M Double sided tape OR a hand held dispenser style like Stampin’ Seal.
I don’t like liquid adhesive for envelopes because while this is a very nice weight of paper, it is still a copy paper grade paper and shows liquid glue lines. Not what we want on a pretty custom envelope!
I added just a touch of Designer Series Paper to the front to coordinate the card & envelope.
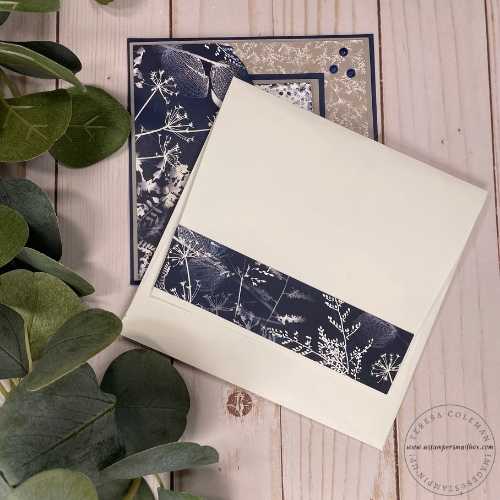
This paper is so beautiful that I decided to take a scrap from cutting the card piece to
run a simple strip across the back flap.

________________________________

Are you ready to shop for square card products?
Use the link above to go over to my webshop.
___________________________
The project supplies button below is a link to see today’s project sheet.
This also places everything for the project in a shopping cart for you.
For the items you don’t need- simply uncheck:)

_______________________________
Thank you for joining us at A Crafters Collaboration, A Stampers Mailbox and Winged Horse Designs for September Sketch & Color Challenge Mini Blog Hop!
Don’t forget to go check out Donna’s Mini Blog Hop Sketch Challenge Card- click here!
See you tomorrow for the weekly Find Your Inspiration Friday Blog Post.
Have a Stampin’ Good Day!
Teresa
