Say that 3 times fast:). The October Paper Pumpkin kit is a beauty! As soon as I opened it, I knew this silver foiled envelope would have to be a treat bag! Envelopes make fun candy pouches. This one is quite narrow as I wanted as much off the silver folded tree detail as possible to show.
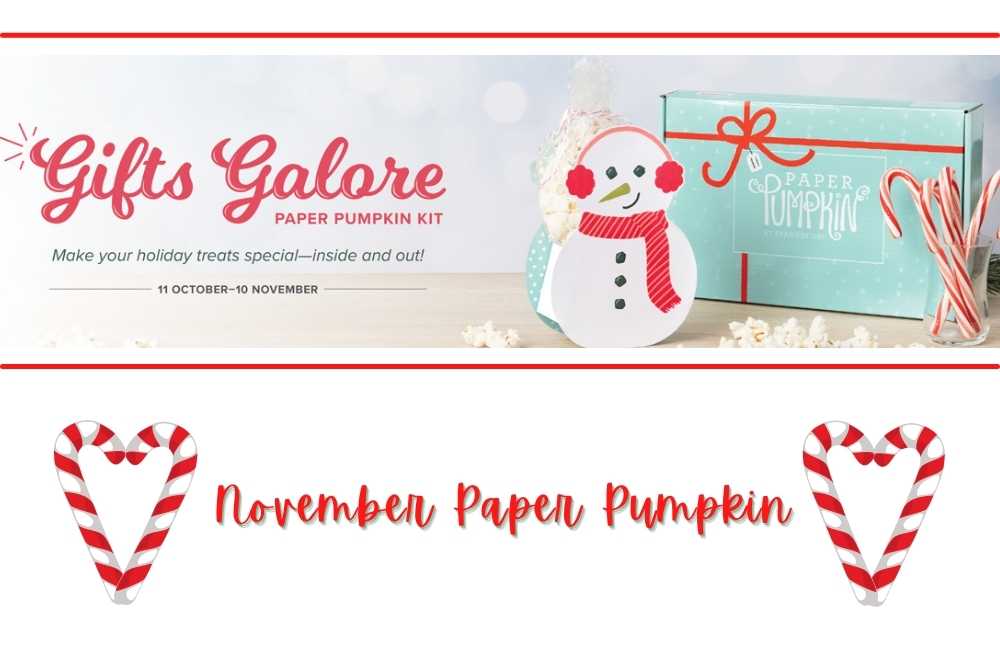
October is on it’s last (just wow) If you missed this Paper Pumpkin kit – there is plenty of time to get in on the November Kit! I will talk it up at the end of this post with links for PP fun!
This bag has gusseted sides and a flat bottom reinforced with a strip of chipboard inside to help stabilize the bag.
How to:
Using the Paper Trimmer to cut flap off- keep this- this lovely buffalo check inside makes great layers for other projects
Score the 3 closed sides 1/2″ on each side. Flip the envelope over to score the other side at same 1/2″ you want a good score line.
Burnish the score lines well ( back & forth several times)
Place your hand inside the envelope to open the gussets and flatten the bottom.
The corners of the envelop will make tiny flaps- squeeze these down and place a 1/2″ pc of tape as close to the point as you can. Fold the little tabs down to adhere.
Cut a piece of chipboard slightly under this measurement 1″ x 4 3/4″to place inside.
Decorate as you like. I had fun with the stamp set and ink from this months kit.
Fill with candy, a gift card or other treats. Staple or Tape to close.
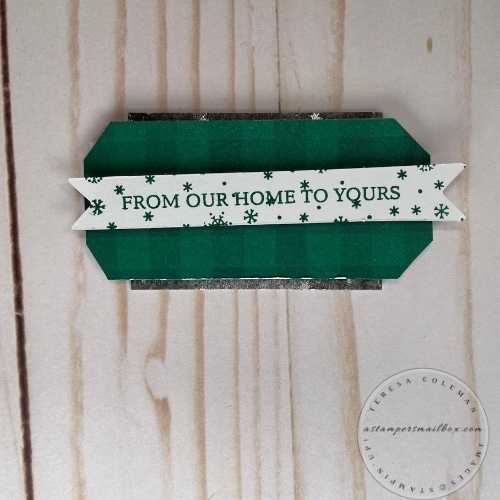
I used the flap cut-away envelope flap piece from the previous project for this cute little tag. As well, I cut a corner from one of the card bases. (OOPS my tag is crooked, I didn’t notice until I put this photo into the blog article!)
I truly love the Evening Evergreen Open Weave Ribbon. It coordinates with Shaded Spruce so well!
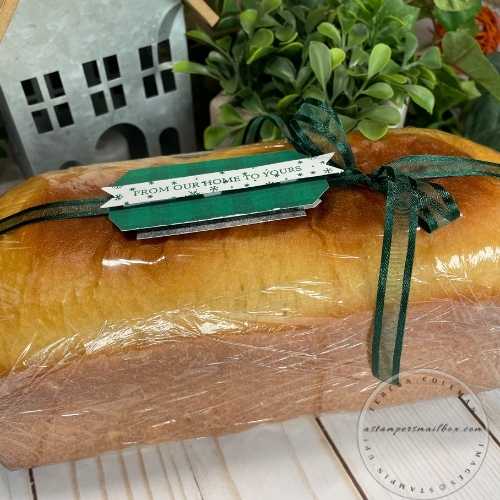
This bread isn’t really a hold over for the holidays but it sure gives you a great idea huh!
This lovely loaf got a ribbon and tag swap for my Dad’s birthday!
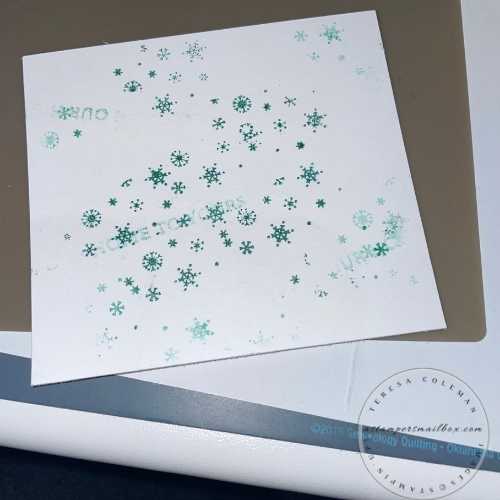
This tag gets the ‘ no ink goes to waste’ treatment! While stamping the tag for the bread gift above – I used the silicone craft sheet and this was what was left behind…
I grabbed a square of white cardstock and placed it right over the ink.
I continued to lift the stamped images right off the silicone mat until the square had nice coverage- it looks kind of messy at first but look at how it turned into a cute tag!
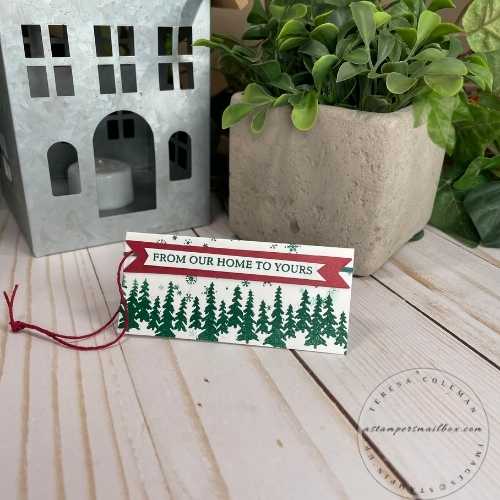
Here is the finished tag one more time. Adding a line of trees & greeting from the Paper Pumpkin stamp set and a red banner from the kit. Gift Tags made easy!
It will be cute on any holiday homemade kitchen gift!
One more idea- Which really isn’t an idea as much as it’s a try to be creative in using up all the pieces in the kit and not wasting lovely cardstock. I stole a corner from the card shown below to make the bread tag. This card base is so pretty I didn’t want it to just sit in the box!
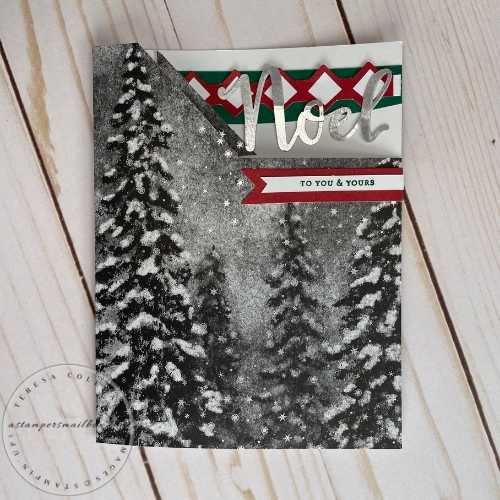
As well, while popping out all the red banner pieces I was pondering this…
How to use that cut piece closest to the scissors. This is what I did. ( not sure I’m in love with this card – but it’s in the Christmas Card pile now:). I wanted some of this grey snowflake pattern on the bread tag so I just nipped a corner from this card.
Seriously, my thought went along the lines of – “ok, genius now what?”.
Who else talks to themselves when crafting and occasionally ‘suzy sarcasm’ comes out? 🙂
Using those scraps from the banners, the cut off envelope flap and the lovely silver Noel from the kit the card turned out to be A-ok. The envelope flap piece: I couldn’t let that beautiful Shaded Spruce buffalo check pattern go to waste ya know…
Extra’s used in these projects ~ not part of the Paper Pumpkin kit.
Watch for this Image tomorrow! A full article on the upcoming November kit! You can subscribe anytime to get in on the fun seasonal ideas Stampin’Up! has in store for us! Can’t wait to see that post?


