Monday Mailbox Makeovers!
Edition #1
Hallo, first Monday in October! Today I am kicking off a new blog series, all about project makeovers. I will be challenging myself to take a Before / After approach to paper crating and tutorial writing.
You will see me do ‘selfie-style’ makeovers, everyday random item makeovers, ‘hmm; I didn’t think of that’ kind of makeovers and more!
Check in on Mondays to see what’s up here at A Stampers Mailbox!
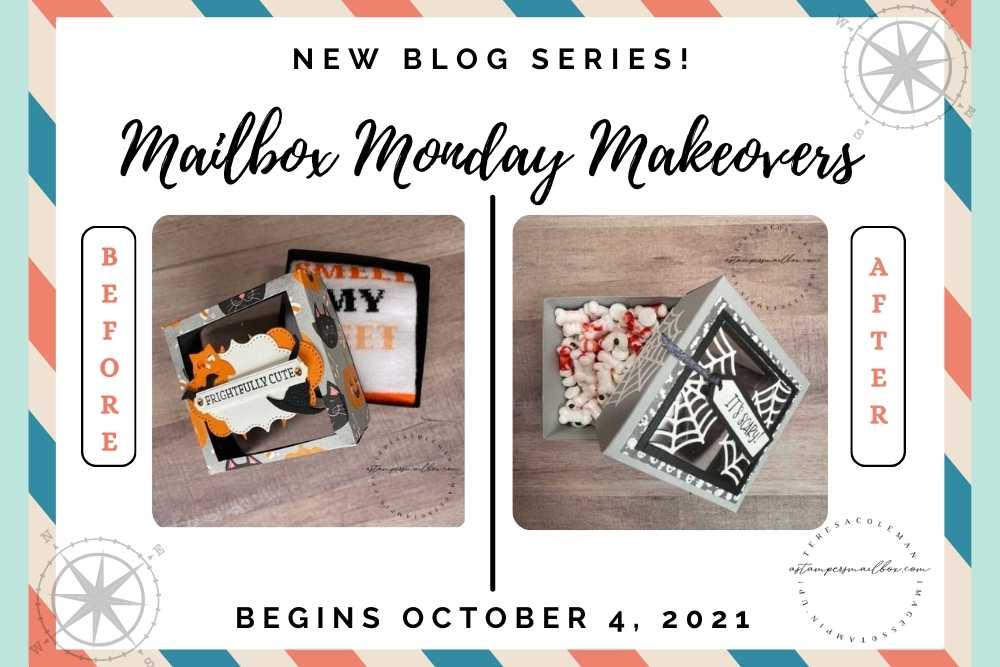
This week’s project is ‘Selfie Style’, I have had alot of fun with my 3 x 3 box idea lately and am bringing it into the blog ONE more time. I hope I’m not oversharing this fun idea but I love this little box shape and the window cut out to see the treats inside!
It’s sized perfectly for kiddo candies, treats or spooky sugar cookies!
Check out the before: This box was demonstrated during my Sept. 17th Facebook Live. It’s available on replay if you want to hop over to Facebook to watch.
It’s a great resource for the details on how I made this box.
Here are the before photos: a few weeks ago…


Below is the after – Halloween Spooky Style!
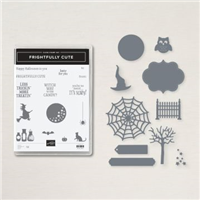
The extra die cutting takes using this Frightfully Cute bundle up a notch!

Makeover Process
This box isn’t much of a real ‘makeover’ it’s more like “Selfie Style: MadeUp with great cosmetics”! I love this scary spider web version of the box. It’s filled with bone and eyeball candy. Perfect for bigger kids! The bone candy to me tastes kinda like fruit Spree candies.
Here is what I did to make my simple Facebook Live box spruced up a bit on this Mailbox Makeover.
I followed the same basic format & measurements for the as the Facebook Live on Sept 17th.
Box Base: 5 1/2″ x 5 1/2″ Score at 1 1/4″ on all four sides.
Lid: 5 1/2″ x 5 1/2″ Score at 1/16th less than 1 1/4″ on all four sides.
Color: Smoky Slate
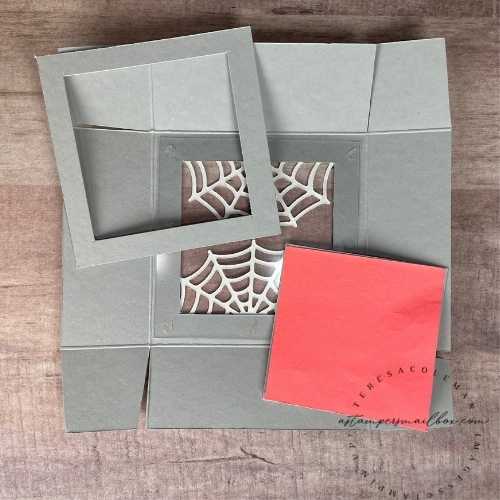
In the above photo you can see that I put the window sheet on the inside rather than the outside. In hindsight, after working through the design process I ended up putting a Designer Series Paper ‘frame’ on the top to cover the cut edges of the web. I could have skipped this step because it ended up causing me to add an additional grey frame on the lid (inside) to cover the raw edge of the window sheet. This step is just not needed. Follow the FB Live video tutorial linked above for easier placement of the window sheet if you plan on having a patterned paper frame like mine or are covering your lid with DSP like I did in the ‘before’ version.

Time to add the web over the window sheet!

I created the DSP frame by using the post-it note trick I taught during the Facebook Live Demonstration. Trim a Post-It note to the inner frame size that you want then use your paper trimmer to cut it out.
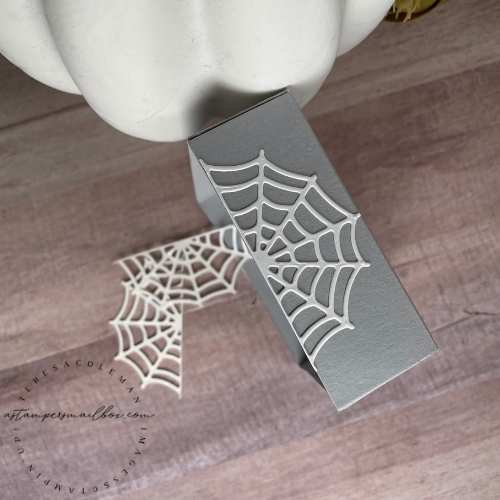
Adding more spider web on all four sides!
Apply Adhesive Sheet to white cardstock, die cut the webs, peel backer & apply.
The use of adhesive sheets makes this super fast & no mess!

I finished it off with an addition of a thin black frame- adhesive sheet here is super helpful too!
Finishing out this Monday Mailbox Makeover “Selfie Style” with a recap:
-
I didn’t have thin black ribbon so I made my own! I used the Open Weave Fresh Freesia color- I cut the ribbon down lengthwise using fabric scissors to trim away the shiny side. Then I took a Dark Black Stampin’Blend Marker to turn that Fresh Freesia Ribbon into thin black shiny ribbon! Two seconds flat! This is so great!
-
With the candies, the box base is rather heavy; so to keep the box and lid together I added velcro dots on two sides.
-
I kept the top sentiment simple to let the spider webbing be the spooky star of this project! The candy and Spider Webbing: It’s Scary!!!
-
Candies found at Target back in the Halloween Section – I found these on the same shopping trip as the socks:). HYDE & EEK is the brand logo (Hilarious)
Tip: Use any alcohol based marker for this ribbon coloring trick! Even a sharpie will do in a pinch! Dries quick and is permanent!
Products Used in this Project


